Drip Irrigation for Raised Beds
A simple drip system that waters raised beds slowly and evenly at the root zone, saving water and preventing disease.
Estimated time
1 – 2 hours for two beds; 2 – 4 hours for four beds plus buried line
Lifespan
5–7 years for tubing; 1–2 years for emitters
Soil needed
None — irrigation system
Weight empty
5–10 lbs
Weight full
N/A
Best for
All raised beds, especially tomatoes, peppers, squash, and melons
Placement
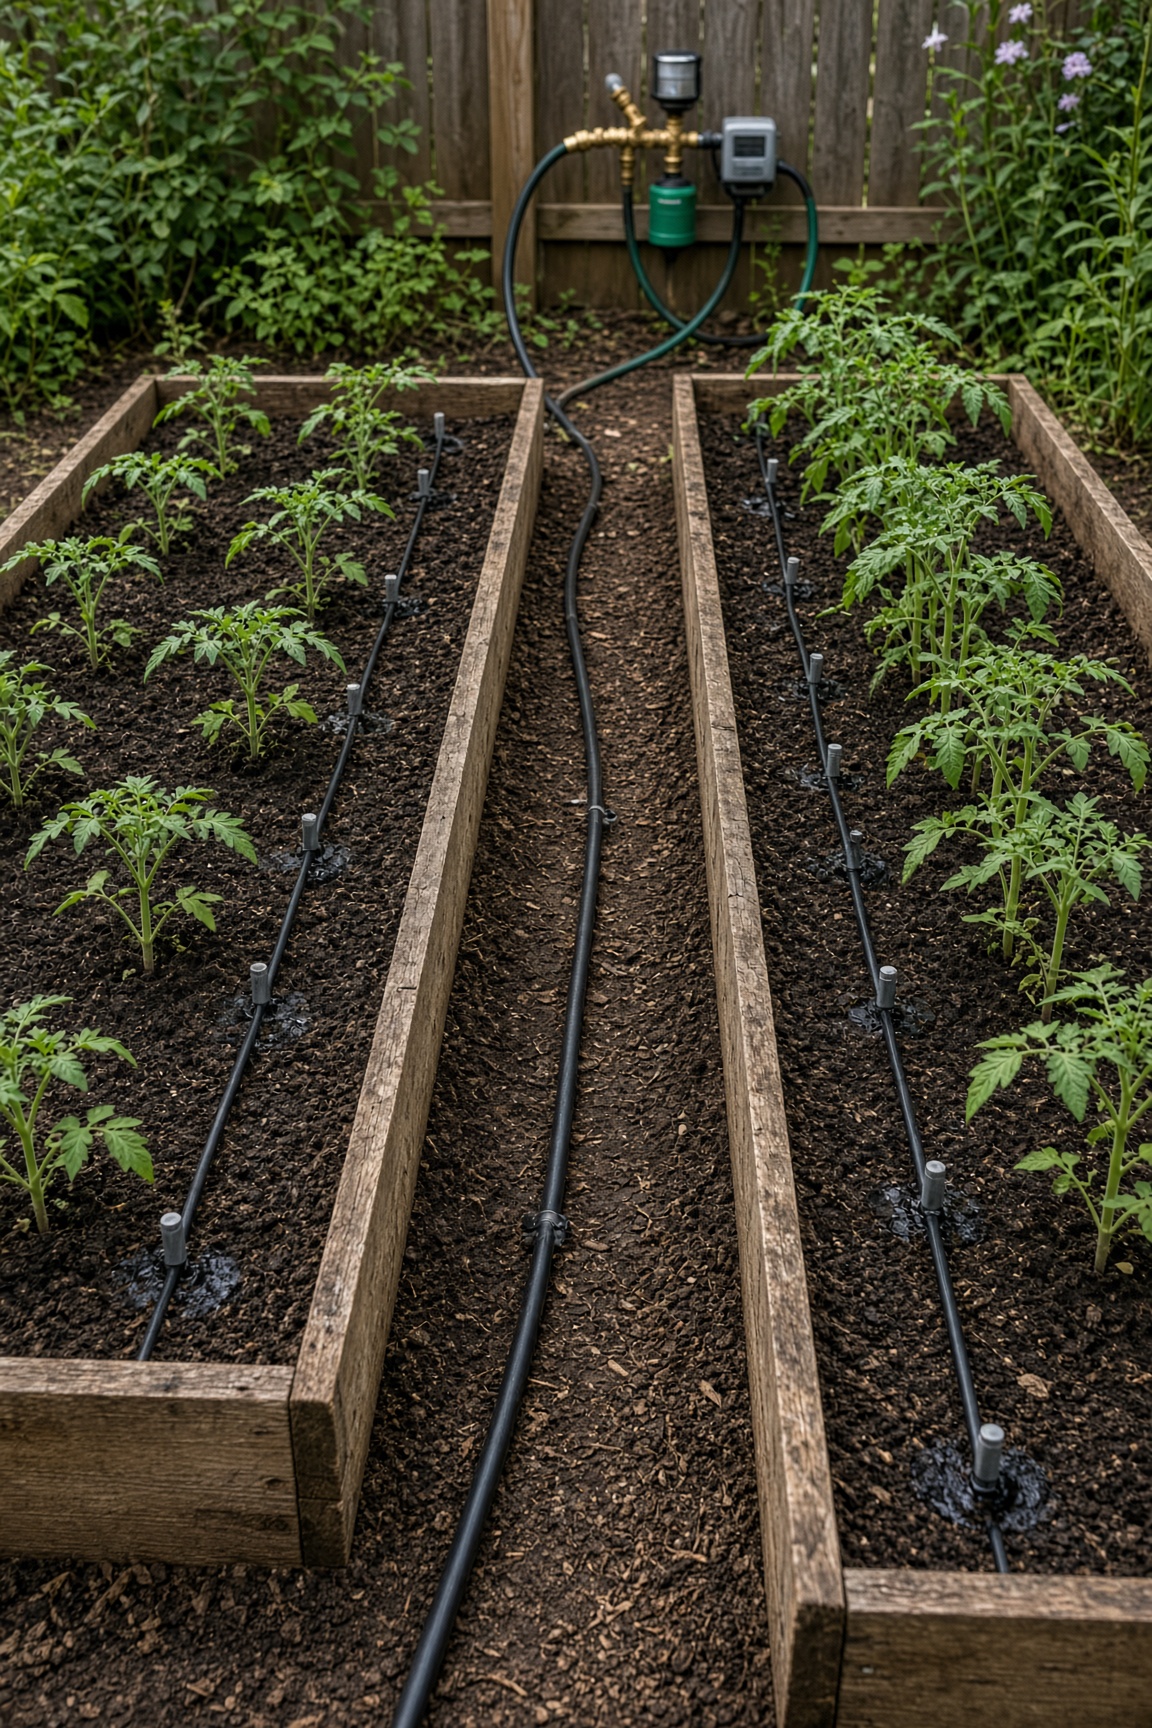
Run the main line along the path, not through the bed, so you can weed and harvest easily.
Parts to Buy
| Part | Quantity | What You Use Them For |
|---|---|---|
| 1/2 inch mainline tubing, 100 ft | 1 | Header line |
| 1/4 inch emitter tubing, 50 ft | 2 | Runs down each bed |
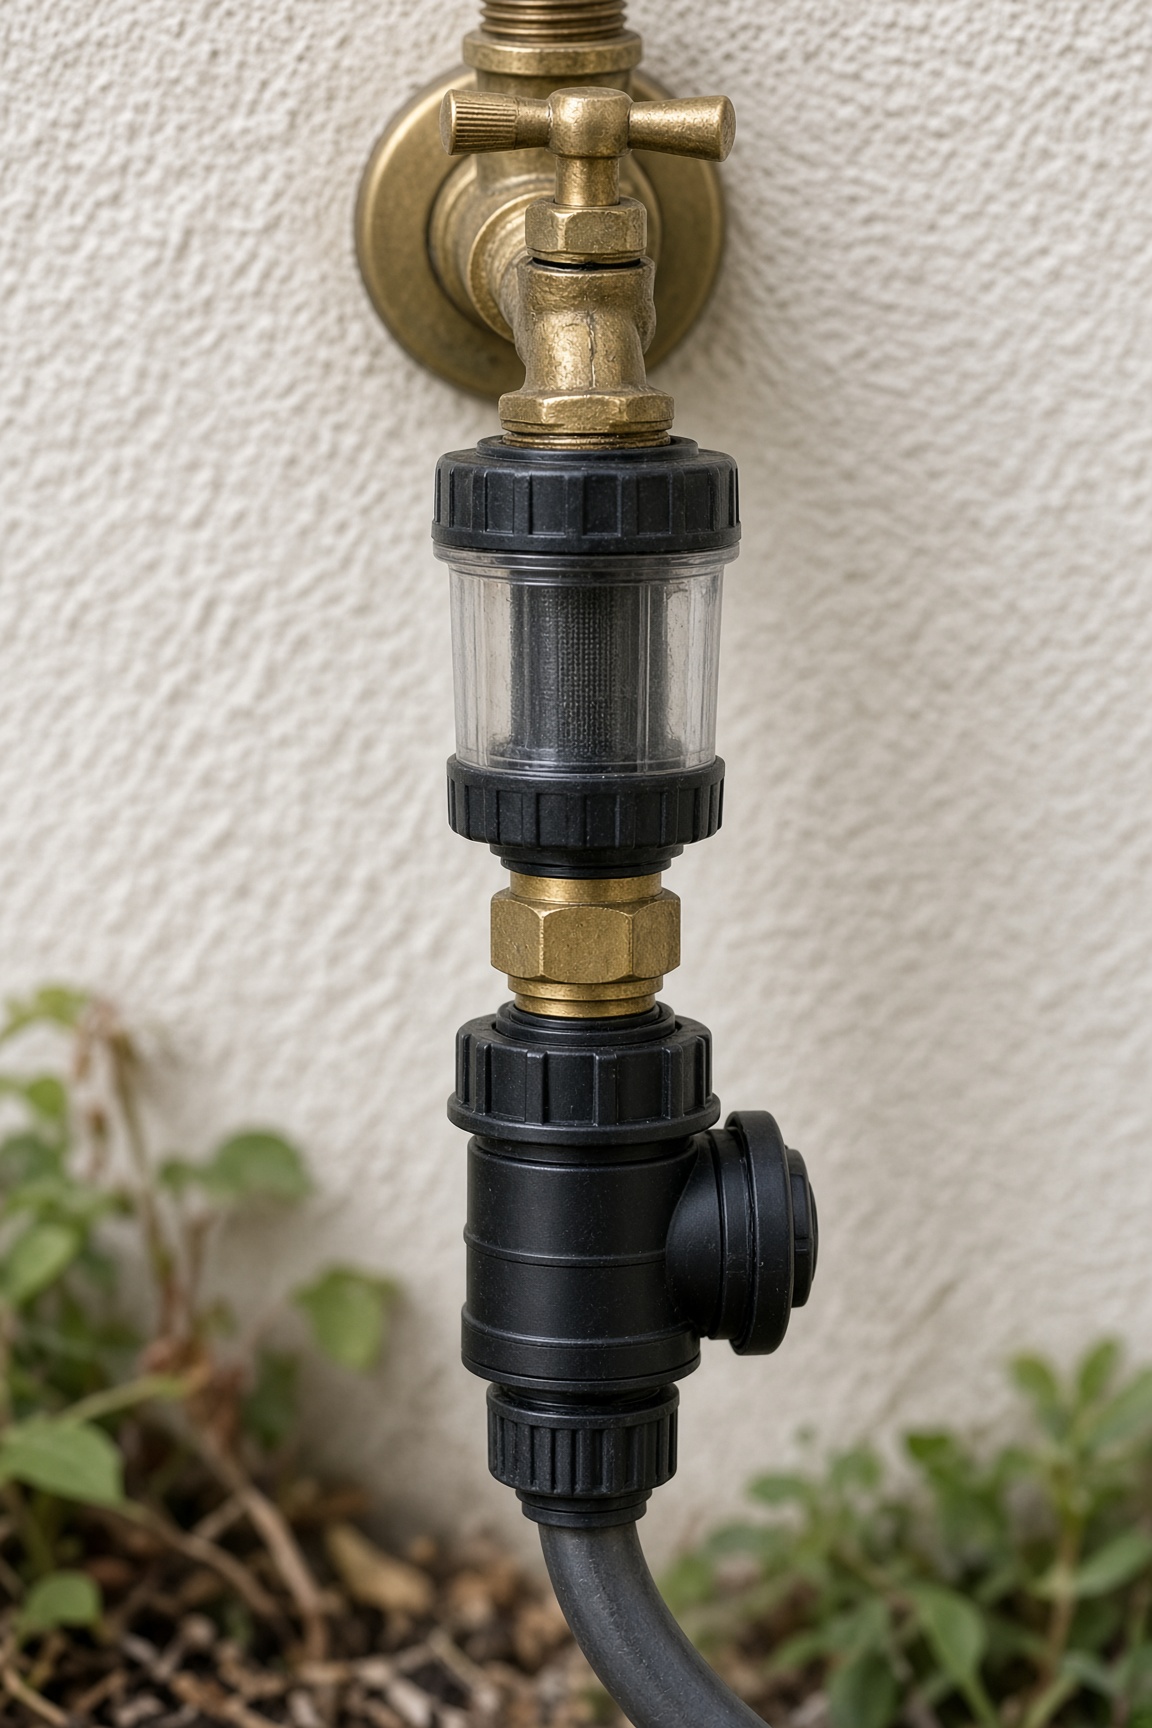
| Backflow preventer (hose-thread) | 1 | Required by many codes; protects household water |
| Hose-thread filter (150 mesh) | 1 | Catches debris |
| Pressure regulator, 25 PSI | 1 | Protects emitters |
| Battery-powered hose timer | 1 | Automates watering |
| Barbed fittings and end caps | 1 kit | Connections |
- ·Tubing stakes or landscape pins
- ·Goof plugs for leaks
- ·Mulch to cover 1/4-inch lines
Steps
- 1Install the faucet assembly in this order: backflow preventer → filter → 25 PSI pressure regulator → timer → 1/2-inch mainline. Some cities require the backflow piece; it also keeps garden water from siphoning back into your house line.
- 2Run the 1/2-inch mainline along the path between or behind beds, not through the growing area.
- 3Punch holes in the mainline at each bed using a hole punch, then connect 1/4-inch emitter tubing with barbed fittings.
- 4Run emitter lines down each row inside the bed. Space lines 10–12 inches apart for even coverage.
- 5Cap the ends of each emitter line and secure tubing with stakes.
- 6Cover the 1/4-inch lines with mulch so sun doesn't cook and crack them.
- 7Count total emitters and check flow at the farthest bed. If the far bed is weak, you have too many on one bib — split into two zones or run fewer emitters.
- 8Set the timer for early morning. Wet leaves at night invite disease.
- 9Test the system and adjust emitter placement around plants.
- 10Before the first freeze: flush the lines, drain them, remove the timer and filter, and store them indoors.
Tools needed
- ·Tubing cutter or sharp scissors
- ·Tape measure
- ·Hammer for stakes
Common mistakes to avoid
- ·Too many emitters on one faucet — the far bed gets weak pressure. Count emitters and split into zones if needed
- ·No pressure regulator — high pressure blows emitters off
- ·No filter — particles clog emitters in one season
- ·Skipping the backflow preventer — some cities require it and it keeps garden water out of your house line
- ·Forgetting to flush and drain the system before freezing weather
Maintenance tips
Flush lines monthly. Clean the filter weekly during heavy use. Store the timer and filter indoors in winter.
Community builds
See how other gardeners built their drip irrigation for raised beds — and share photos of yours.
Sign in to view photos other gardeners have shared.
Sign in to share photos of your build.