5-Gallon Bucket Deep Water Culture (DWC) Hydro System
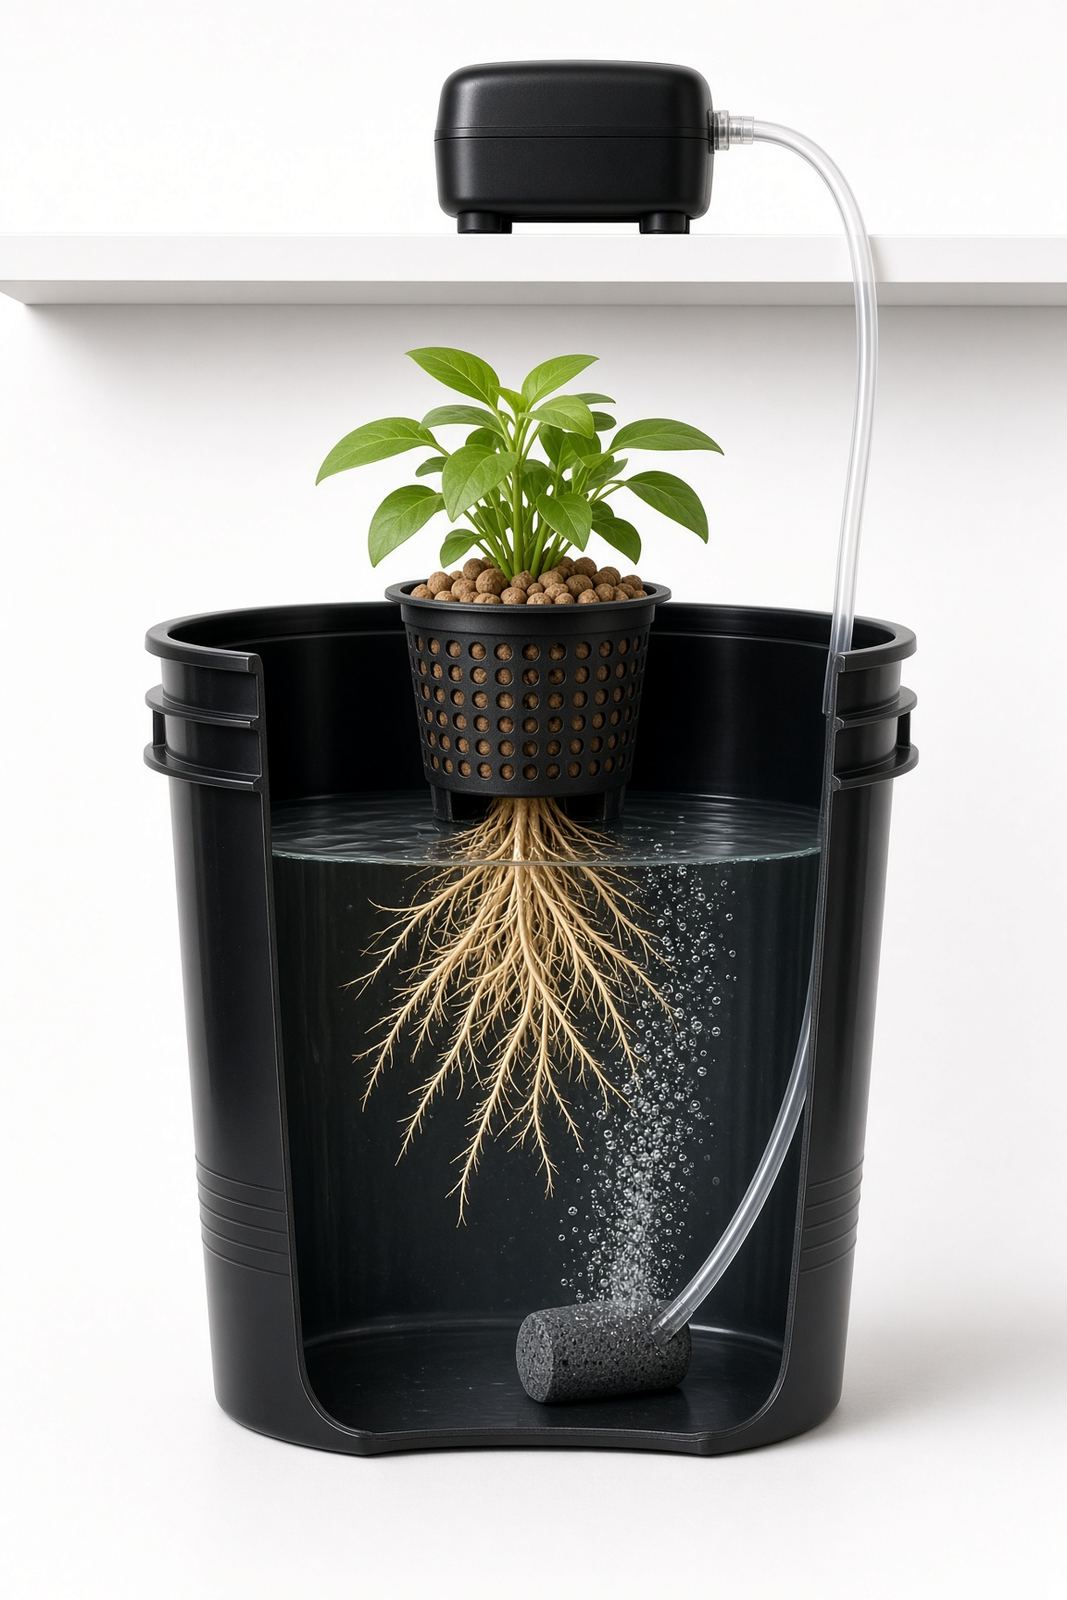
The easiest real hydroponic system. Each plant sits in a net-pot lid over a bucket of nutrient water, with an air stone bubbling oxygen to the roots. No timers, no plumbing.
Estimated time
2 – 3 hours
Lifespan
5+ years (pumps last 1–2 seasons)
Soil needed
None — clay pebbles (hydroton) only, about 1 gallon per bucket
Weight empty
3–5 lbs per bucket
Weight full
35–40 lbs per bucket (filled with water)
Best for
Tomatoes, peppers, cucumbers, big basil — one large plant per bucket
Placement
Indoors under lights or outdoors in part shade. Keep buckets out of direct sun so the water stays under 72°F. Plug the pump into a GFCI outlet and keep cords/power strips off the wet floor.
Reservoir rule
Keep light out of the water. If the tank sits in sun or under bright lights, use dark/black toward the water and white on the outside. Put a lid on it.
- Black/opaque inside = no algae
- White outside = cooler water
Parts to Buy
| Part | Quantity | What You Use Them For |
|---|---|---|
| 5-gallon food-safe buckets with lids | 4 | One reservoir per plant |
| 6-inch net pot lids (or 3-inch net pots + hole saw) | 4 | Holds the plant above the water |
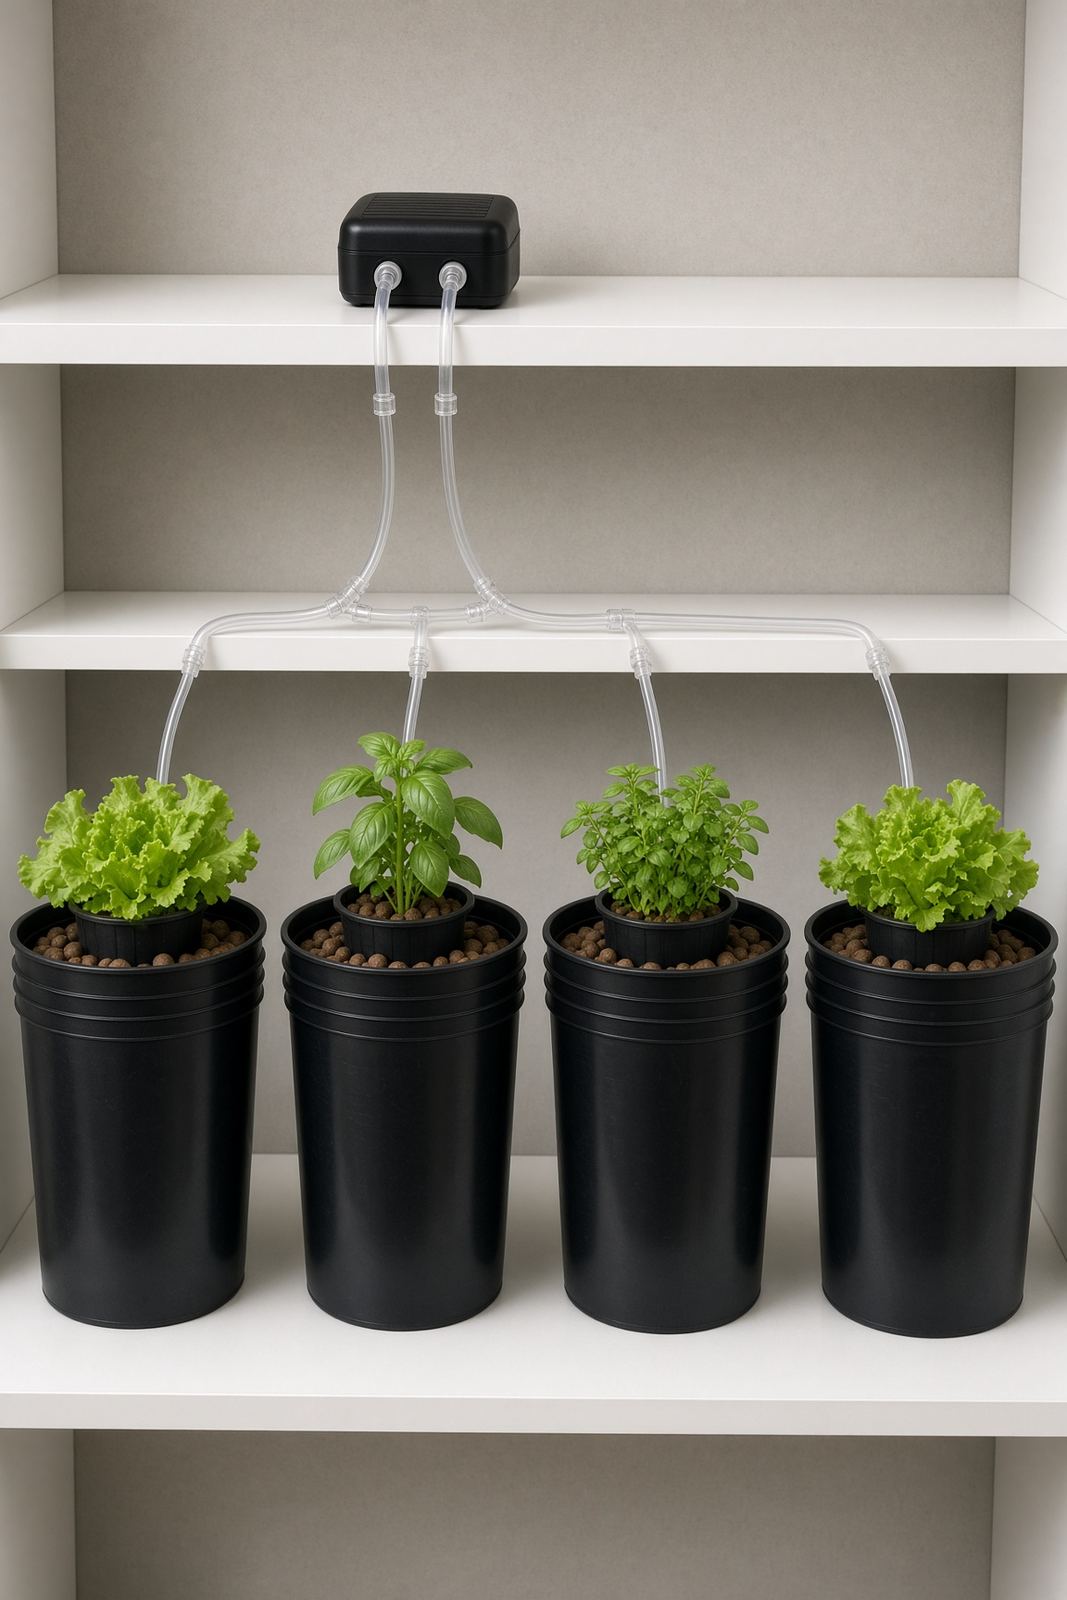
| Air pump (4-outlet, 4W+) | 1 | Feeds all four buckets |
| Air stones (round or cylinder) | 4 | One per bucket, sits on the bottom |
| Airline tubing (25 ft) + check valves | 1 roll | Pump to stones; check valves stop backflow |
| Clay pebbles (hydroton), 25 L bag | 1 | Support media in the net pot |
| 2-inch rockwool cubes or starter plugs | 4 | Start seedlings before transplant |
- ·Hydroponic nutrients (a 3-part or 2-part vegetative + bloom set)
- ·pH Up / pH Down and a digital pH pen
- ·TDS / EC meter (optional but strongly recommended)
- ·Black electrical tape or panda film — to light-proof clear buckets (dark toward the water; white outside if buckets sit in sun)
- ·5-gallon food-safe bucket for mixing nutrient solution
- ·3/4" bulkhead fitting + small ball valve (optional drain upgrade)
- ·Plumber's tape (optional, for the drain bulkhead)
- ·Plant stakes or a small tomato cage per bucket
- ·GFCI outlet or adapter for the air pump
Steps
- 1Use food-safe buckets only. Rinse every bucket, lid, and net pot with warm water. Do not use soap — residue near roots is hard to wash out.
- 2Drill one 3/8" hole in the side of each bucket, about 2 inches down from the rim. This is where the airline enters.
- 3Tape or grommet the airline hole so no light leaks in. A tight grommet also helps the airline stay put.
- 4Optional drain upgrade: drill a 3/4" hole a couple inches from the bottom of the bucket and install a bulkhead fitting with a small ball valve. Position the fitting above the normal water line, point the valve over a catch bucket, and use plumber's tape on the threads. This makes the 10–14 day reservoir changes much cleaner, especially once roots fill the bucket.
- 5If you're cutting your own lid, use the hole saw to cut a hole in the center sized to your net pot, so the net pot rim rests on the lid.
- 6Drop an air stone in the bottom of each bucket. Run tubing from the stone, out the 3/8" hole, to the air pump. Add a check valve on each line with the arrow pointing toward the bucket.
- 7Put the air pump ABOVE the water line (on a shelf or upside-down bucket). If the pump sits lower and the power goes out, water siphons back into the pump.
- 8Mix nutrients in a separate bucket, never dry into the reservoir. Follow the label at half strength for seedlings, full strength once the plant is established.
- 9Check pH after mixing. Target 5.5 – 6.2 for most vegetables. Adjust a few drops at a time and re-test.
- 10Fill each bucket to about 3.5–4 gallons, not the full 5. Once the lid is on, the water should sit about 1 inch below the bottom of the net pot. Roots reach down; the air gap keeps the crown from rotting.
- 11Rinse clay pebbles before use until the dust runs clear. Dusty pebbles cloud the reservoir and can clog the air stone.
- 12Start seeds in rockwool cubes until you see roots poking out the bottom (usually 10–14 days).
- 13Set the rooted cube into the net pot and pack rinsed clay pebbles around it. Keep the cube's top just above the pebble line.
- 14Turn on the air pump and leave it running 24/7. Bubbling should be steady in all four buckets.
- 15For the first week, hand-water the top of the cube once a day until roots reach the water.
- 16Add a stake or small tomato cage right away. Tomatoes, peppers, and cucumbers get tall and will tip a full bucket if left unsupported.
- 17Top off with plain pH-adjusted water as the level drops. Do a full reservoir change every 10–14 days. If you added the drain valve, open it slowly into a spare bucket so you don't disturb the roots.
- 18Light-proof anything that lets light hit the water — algae is the #1 problem in DWC.
Tools needed
- ·Drill with 3/8" bit (for the airline hole)
- ·Hole saw or spade bit (only if cutting your own net-pot lids or drain hole)
- ·Scissors or utility knife
- ·Measuring cup and a permanent marker
- ·Safety glasses
Common mistakes to avoid
- ·Water level too high, drowning the stem and causing crown rot
- ·Letting the reservoir get warmer than 72°F — warm water holds less oxygen and invites root rot
- ·Mixing nutrients before checking pH, or never checking pH at all
- ·Using clear or translucent buckets without light-proofing them (algae)
- ·Setting the air pump below the buckets with no check valve
- ·Using non-food-safe or soap-washed buckets — only food-safe plastic, rinsed with water, never soap
- ·Plugging the pump into a non-GFCI outlet or letting cords lie on a wet floor
- ·Filling the bucket all the way to 5 gallons — 3.5–4 gallons leaves the right air gap and prevents spills
Maintenance tips
Check water level and pH every 2–3 days. Full nutrient change every 10–14 days. Scrub buckets and soak air stones in vinegar between crops. Replace air stones each season — they clog and lose output.
Community builds
See how other gardeners built their 5-gallon bucket deep water culture (dwc) hydro system — and share photos of yours.
Sign in to view photos other gardeners have shared.
Sign in to share photos of your build.