Garden Hose Reel Station
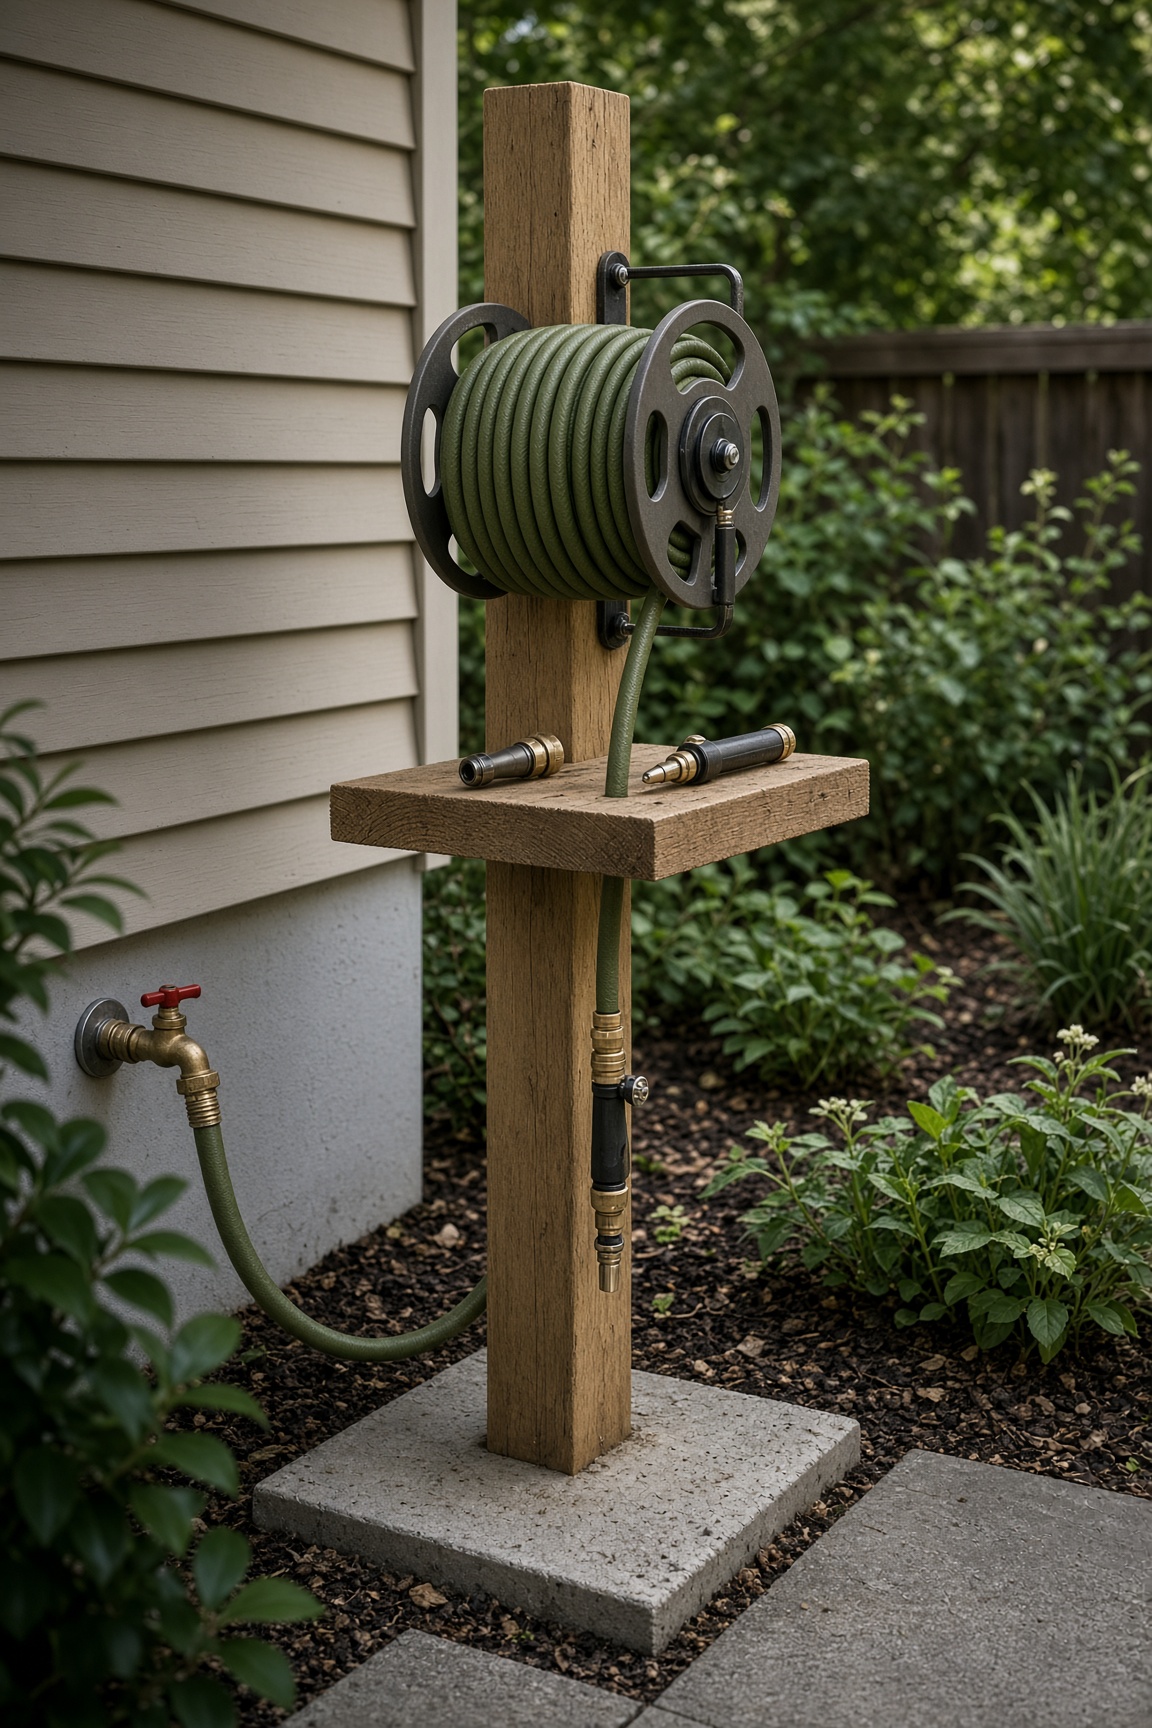
A sturdy post-mounted hose reel with a bracketed shelf — an easy utility build that keeps your hose organized and ready to use.
Estimated time
1 – 2 hours plus 24 hours concrete cure
Lifespan
10+ years
Soil needed
None — utility station
Weight empty
30–50 lbs
Weight full
60–90 lbs with hose and accessories
Best for
Keeping hoses untangled and off the lawn, with storage for nozzles and sprinklers
Placement
Place between the hose bib and the beds you actually water. Shade helps the hose last longer.
Boards to Buy
| Boards to Buy | Quantity | What You Use Them For |
|---|---|---|
| 4×4 post, 8 ft | 1 | Main upright (2 ft buried, ~6 ft showing) |
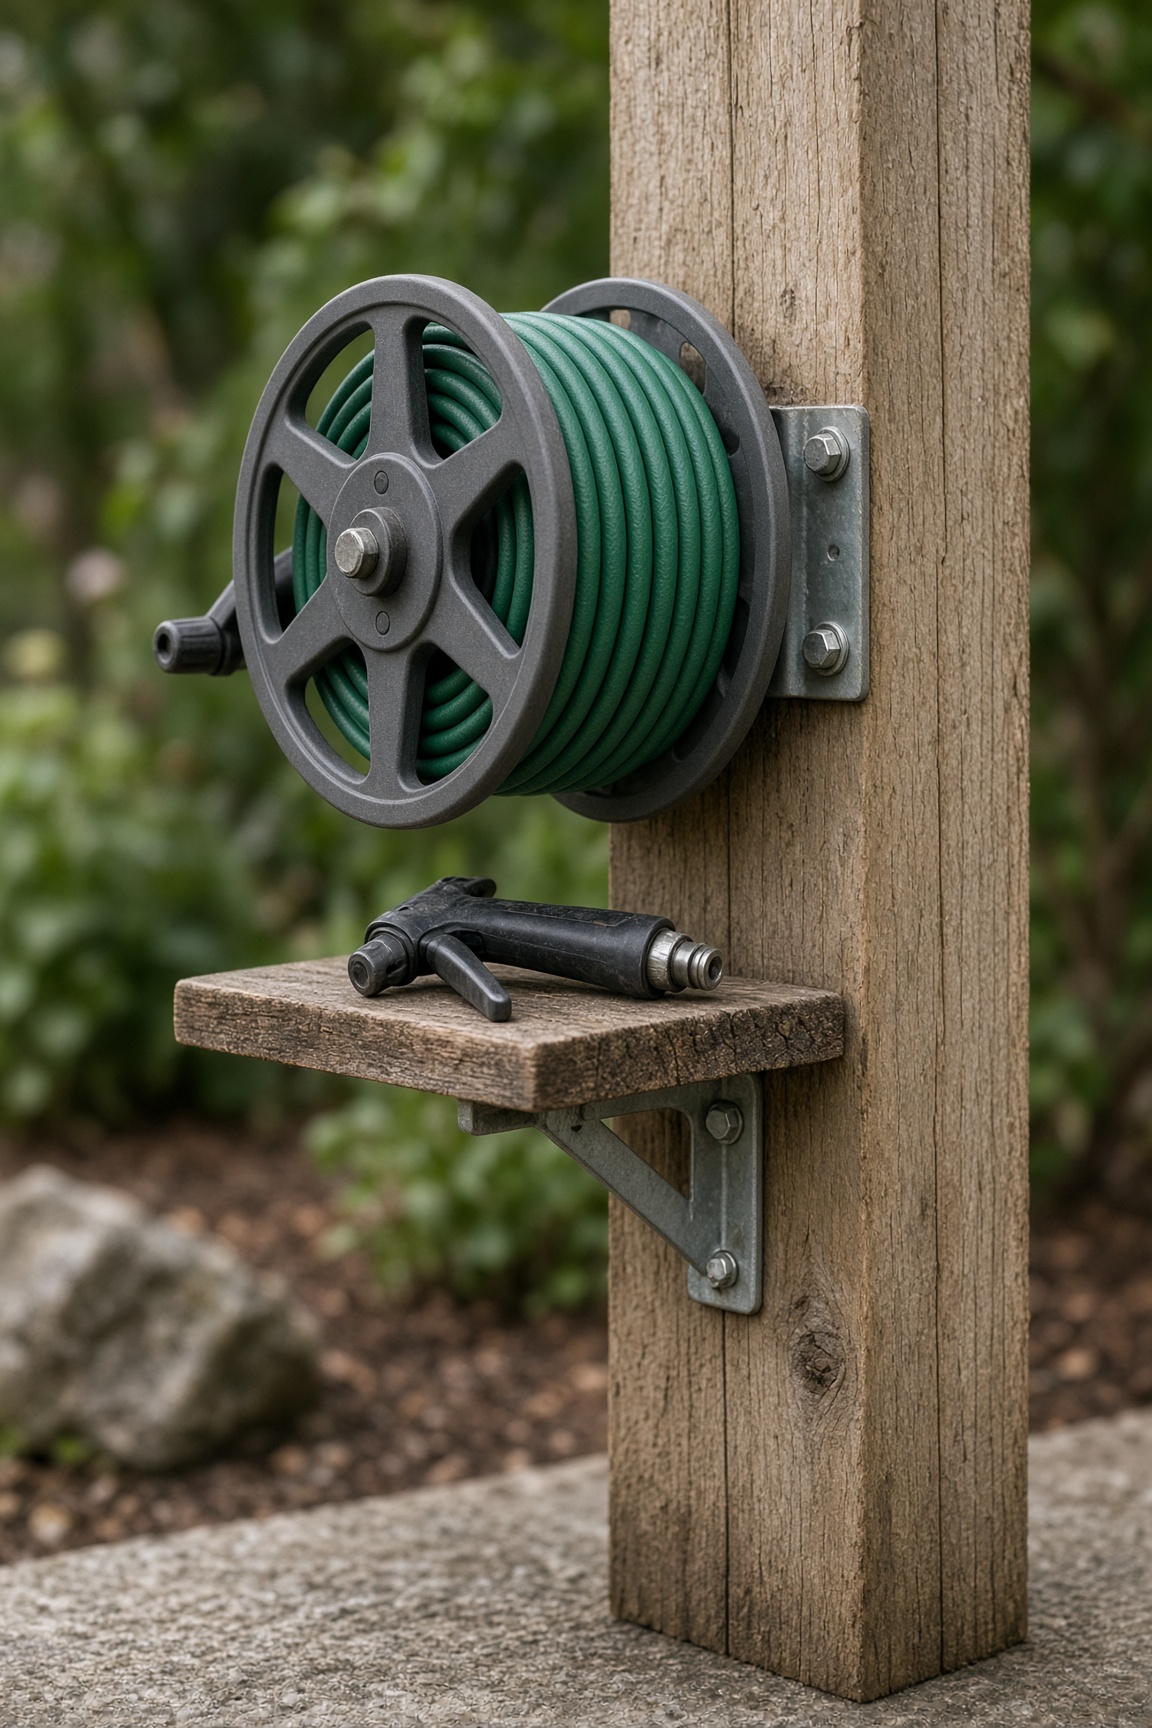
| Wall-mounted hose reel | 1 | Holds the hose — outdoor-rated only |
| 2×10 board, 4 ft | 1 | Shelf for nozzles and sprinklers |
| Shelf brackets or 2×4 cleat | 2 | Support the shelf so it does not sag |
| Concrete mix | 1 bag | Anchor post |
| Gravel | 1 bag | Drainage in post hole and optional pad |
- ·Exterior screws, 3 inch
- ·Optional: S-hooks for hanging nozzles
- ·Optional: Drip tray or extra gravel for a mud-free coil pad
Steps
- 1Dig a 2-foot deep hole for the post.
- 2Add a few inches of gravel at the bottom for drainage, then set the post plumb.
- 3Pour concrete around the post and slope the top so water runs off.
- 4Let the concrete cure at least 24 hours before hanging a 50 lb reel of water.
- 5Mount the hose reel at shoulder height so winding is comfortable, not a shrug.
- 6Attach the shelf below the reel with brackets or a cleat so a 4 ft board does not sag.
- 7Add S-hooks or small bins for accessories.
- 8Lay a drip tray or gravel pad under the coil so the hose does not sit in mud.
- 9Connect the hose, drain it before the first freeze, and test the reel.
Tools needed
- ·Post-hole digger or shovel
- ·Cordless drill / driver
- ·Tape measure and level
- ·Saw
Common mistakes to avoid
- ·Mounting the reel too high or too low — shoulder height is ideal for winding
- ·No shelf brackets — a 4 ft 2×10 will sag off two screws
- ·Using an indoor plastic reel — it cracks and fades in the sun
- ·Hanging the reel before the concrete cures — wait 24 hours for a 50 lb load
- ·Leaving the hose full of water before freeze
- ·Forgetting a drip tray or gravel pad — wet coils make mud
Maintenance tips
Drain the hose before the first freeze. Replace washers when leaks appear. Oil the reel mechanism yearly. Store the reel in shade if possible.
Community builds
See how other gardeners built their garden hose reel station — and share photos of yours.
Sign in to view photos other gardeners have shared.
Sign in to share photos of your build.