Hugelkultur Mound
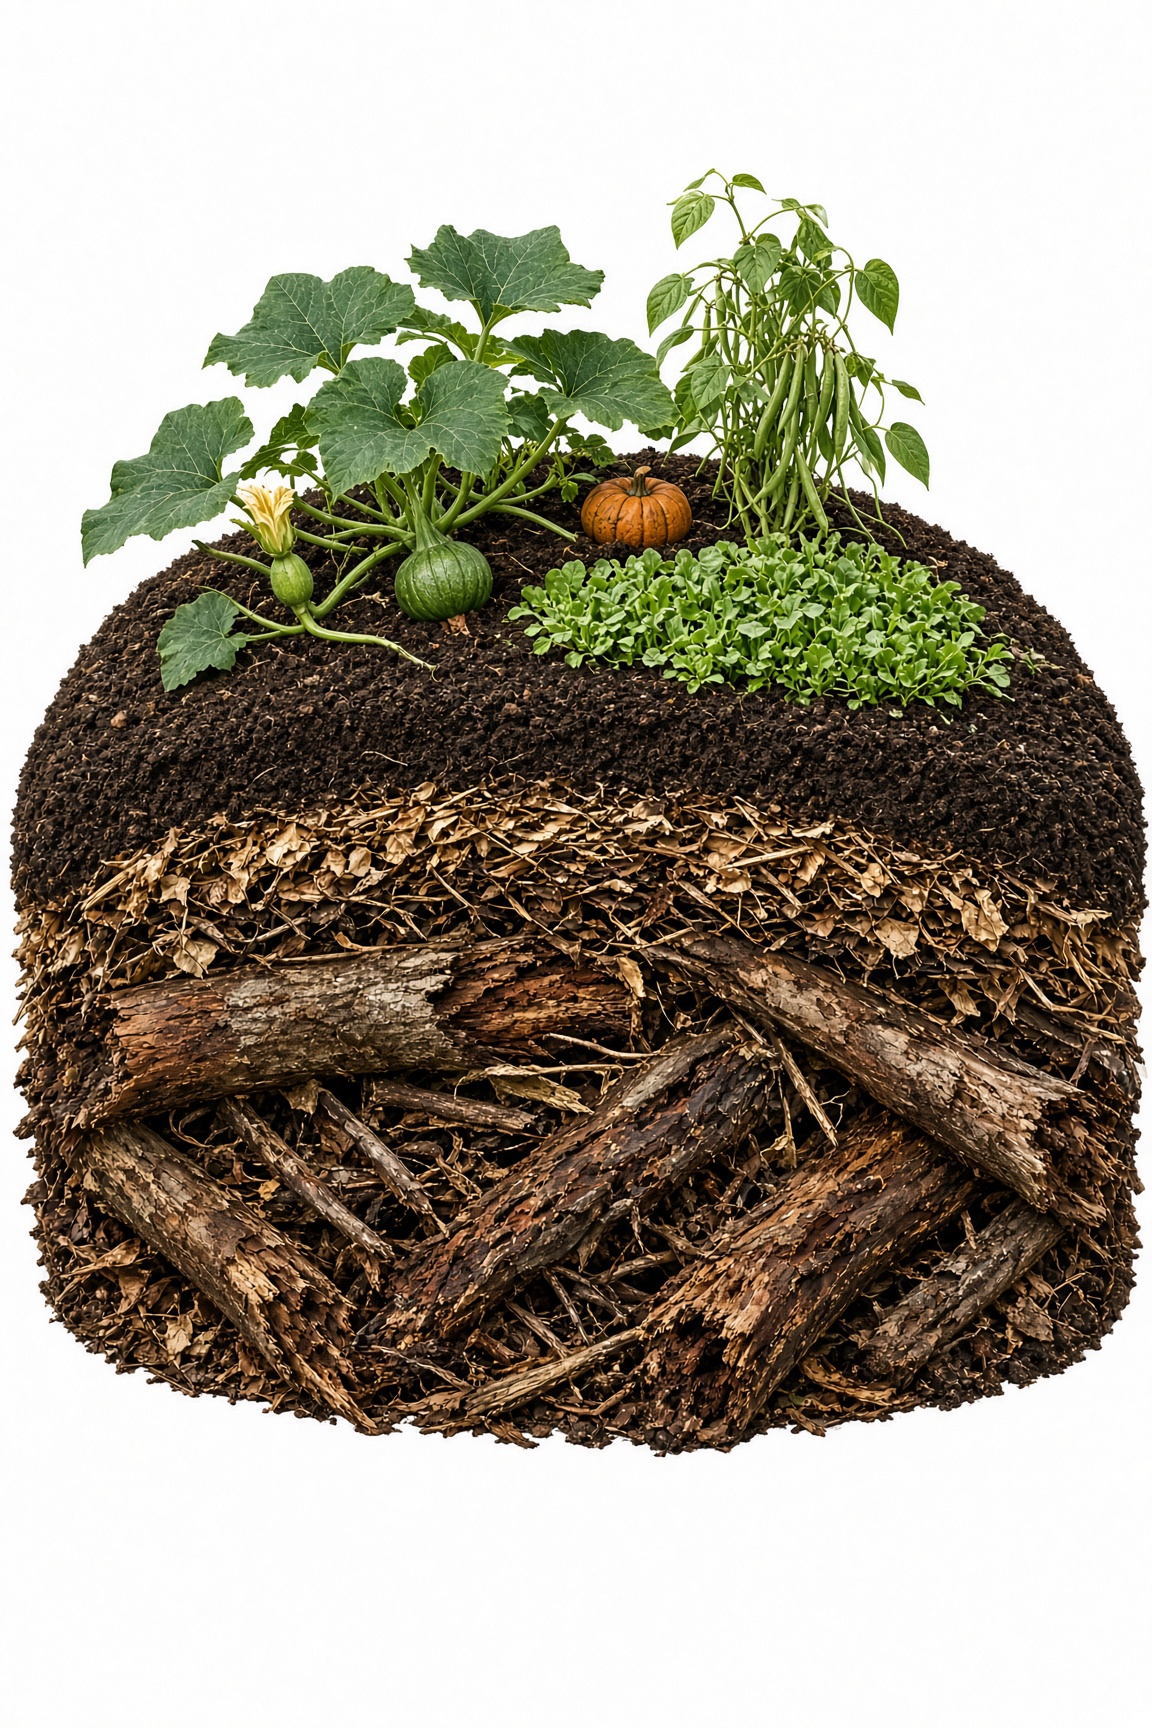
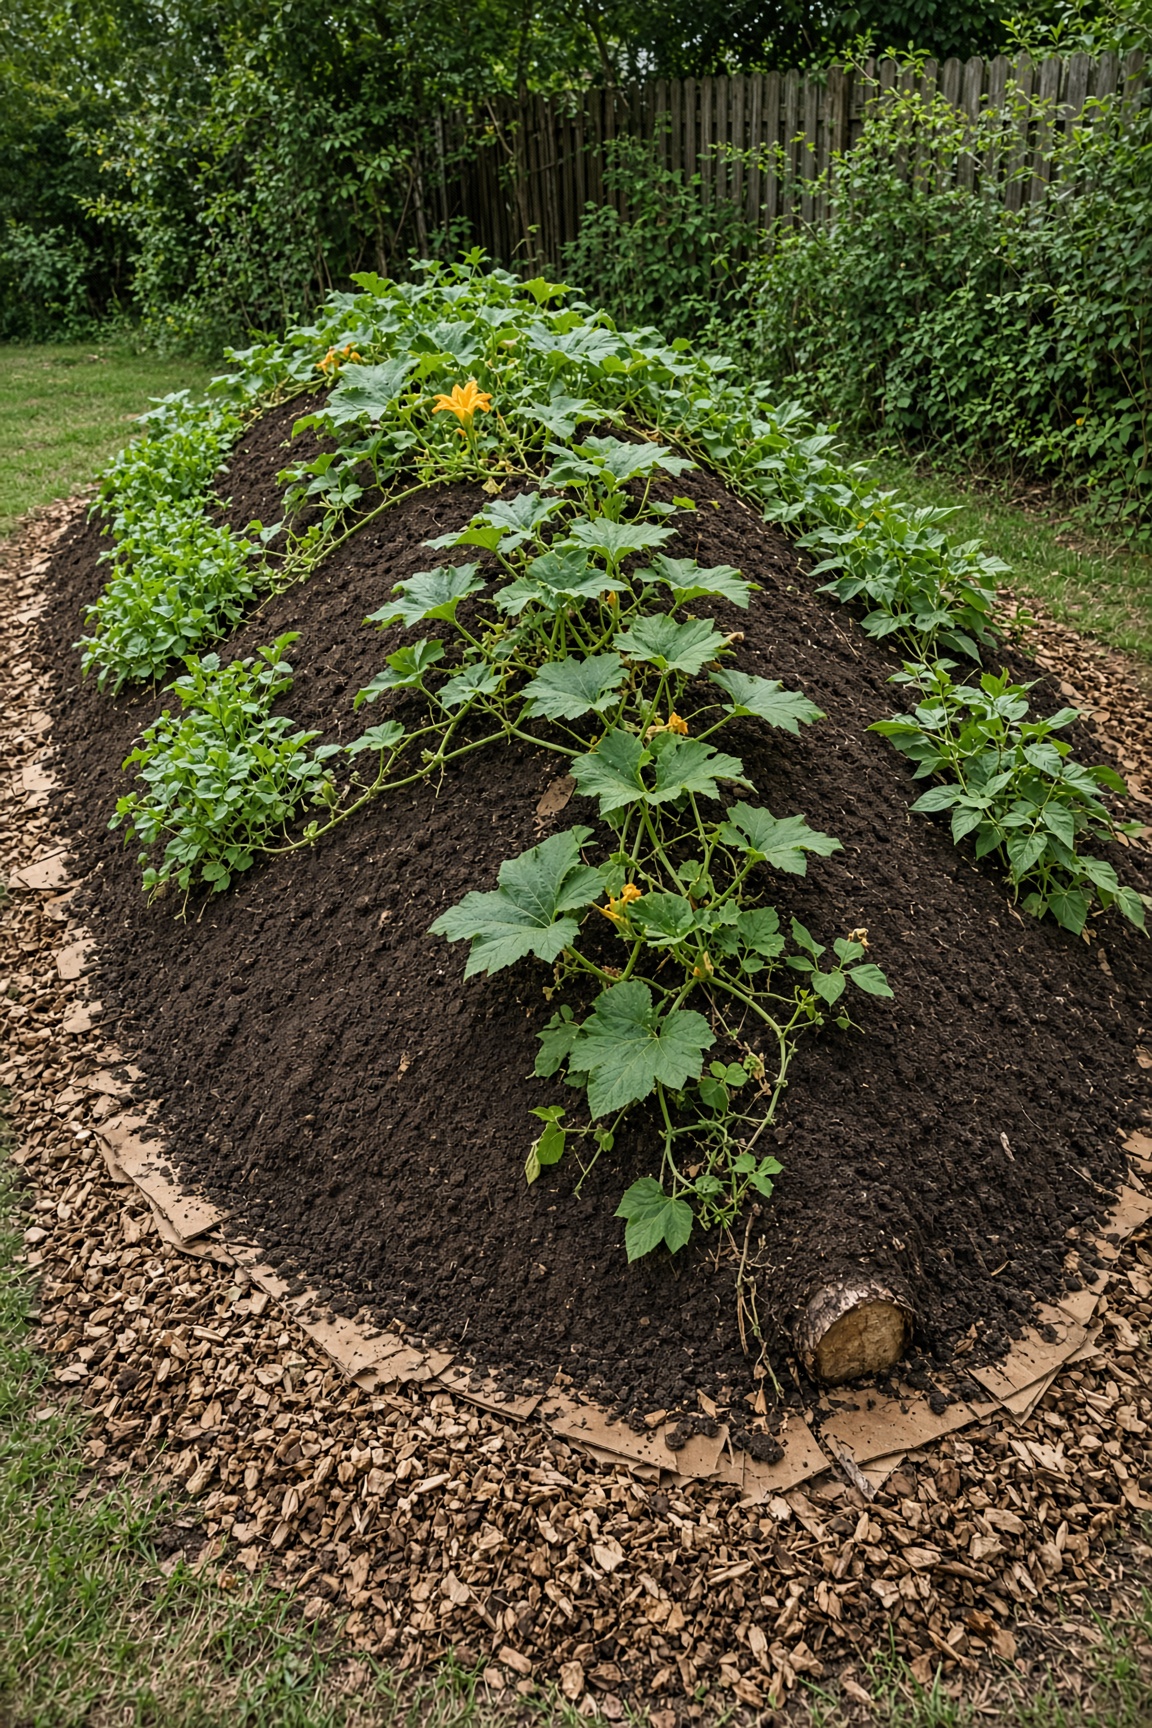
A raised planting mound built over rotting logs and branches. The wood soaks up water like a sponge and slowly feeds the soil as it decomposes.
Estimated time
Half a day (if the wood is already piled nearby)
Lifespan
10–20 years as the wood breaks down
Soil needed
Wood core ~3 ft tall, capped with 4 inches of soil/compost
Weight empty
Depends on wood used
Weight full
Very heavy — build in place, you cannot move it
Best for
Squash, pumpkins, potatoes, corn, beans, and other hungry crops
Placement
Build on contour across a slope to slow water. Build in place — you cannot move it later. Keep large amounts of rotting wood away from the house foundation (termites and carpenter ants).
Parts to Buy
| Part | Quantity | What You Use Them For |
|---|---|---|
| Rotting logs and branches, 3–6 inch diameter | Pile 2 ft deep | Core of the mound |
| Grass clippings, leaves, straw | Several wheelbarrows | Filler between logs |
| Compost or topsoil | Enough for a 4-inch cap | Top layer for planting |
- ·Optional: cardboard base to suppress weeds
Steps
- 1Dig a shallow trench or lay cardboard where the mound will go — build it in place, you cannot move it later.
- 2Pile the largest logs and branches on the bottom, leaving air gaps between them, up to a ~3 ft wood core.
- 3Fill gaps with grass clippings, leaves, and smaller branches.
- 4Add another layer of smaller wood and organic matter.
- 5Cap the wood core with 4 inches of soil and compost — the 4-inch cap sits on top of the 3 ft core.
- 6Shape the sides so they are steep but stable — about 45 degrees.
- 7Soak the mound thoroughly — dry logs do nothing. Water deep right after building and keep it moist the whole first season.
- 8Let it settle for 2–4 weeks if possible, then plant.
- 9Plant heavy feeders on top and shallow-rooted crops on the sides. The first year the wood steals nitrogen, so add extra compost or plant squash, beans, or potatoes.
Tools needed
- ·Shovel
- ·Wheelbarrow
- ·Work gloves
- ·Pruning saw for trimming branches
Common mistakes to avoid
- ·Using fresh green wood — the first year the wood steals nitrogen; add extra compost or plant squash, beans, or potatoes instead of expecting perfect leafy greens
- ·Using treated lumber (chemicals) or black walnut (juglone poisons plants) — prefer already-rotting hardwood or mixed branches; cedar is just slow to rot, not harmful
- ·Not soaking the wood — dry logs do nothing; water deep after building and keep it moist the first season
- ·Making the mound so steep it erodes
Maintenance tips
The mound shrinks every year as the wood breaks down — that's normal, just top-dress with compost each spring. Plant a cover crop on the mound in fall.
Community builds
See how other gardeners built their hugelkultur mound — and share photos of yours.
Sign in to view photos other gardeners have shared.
Sign in to share photos of your build.