No-Pump Kratky Jars & Totes (Easiest Hydro)
Passive hydroponics with zero pumps and zero electricity. You fill the container once, the water level drops as the plant drinks, and an air gap forms for the roots. Perfect first hydro build.
Estimated time
30 – 45 minutes
Lifespan
Indefinite — no moving parts
Soil needed
None — clay pebbles or rockwool only
Weight empty
1–2 lbs per jar
Weight full
5 lbs per jar · 200+ lbs for a full tote
Best for
Lettuce, bok choy, herbs, spinach, arugula — fast, shallow-rooted greens
Placement
A sunny windowsill or under a shop light. Keep jars out of hot afternoon sun or the solution cooks. If leaves wilt and the jar feels warm, move it — cooked solution is the usual fail. For a 27-gallon tote: put it where it will stay before you fill it; a full tote can hit 200+ lbs. Choose a level floor, keep the lid on, and cover the tote with panda film or paint it if it isn't opaque.
Reservoir rule
Keep light out of the water. If the tank sits in sun or under bright lights, use dark/black toward the water and white on the outside. Put a lid on it.
- Black/opaque inside = no algae
- White outside = cooler water
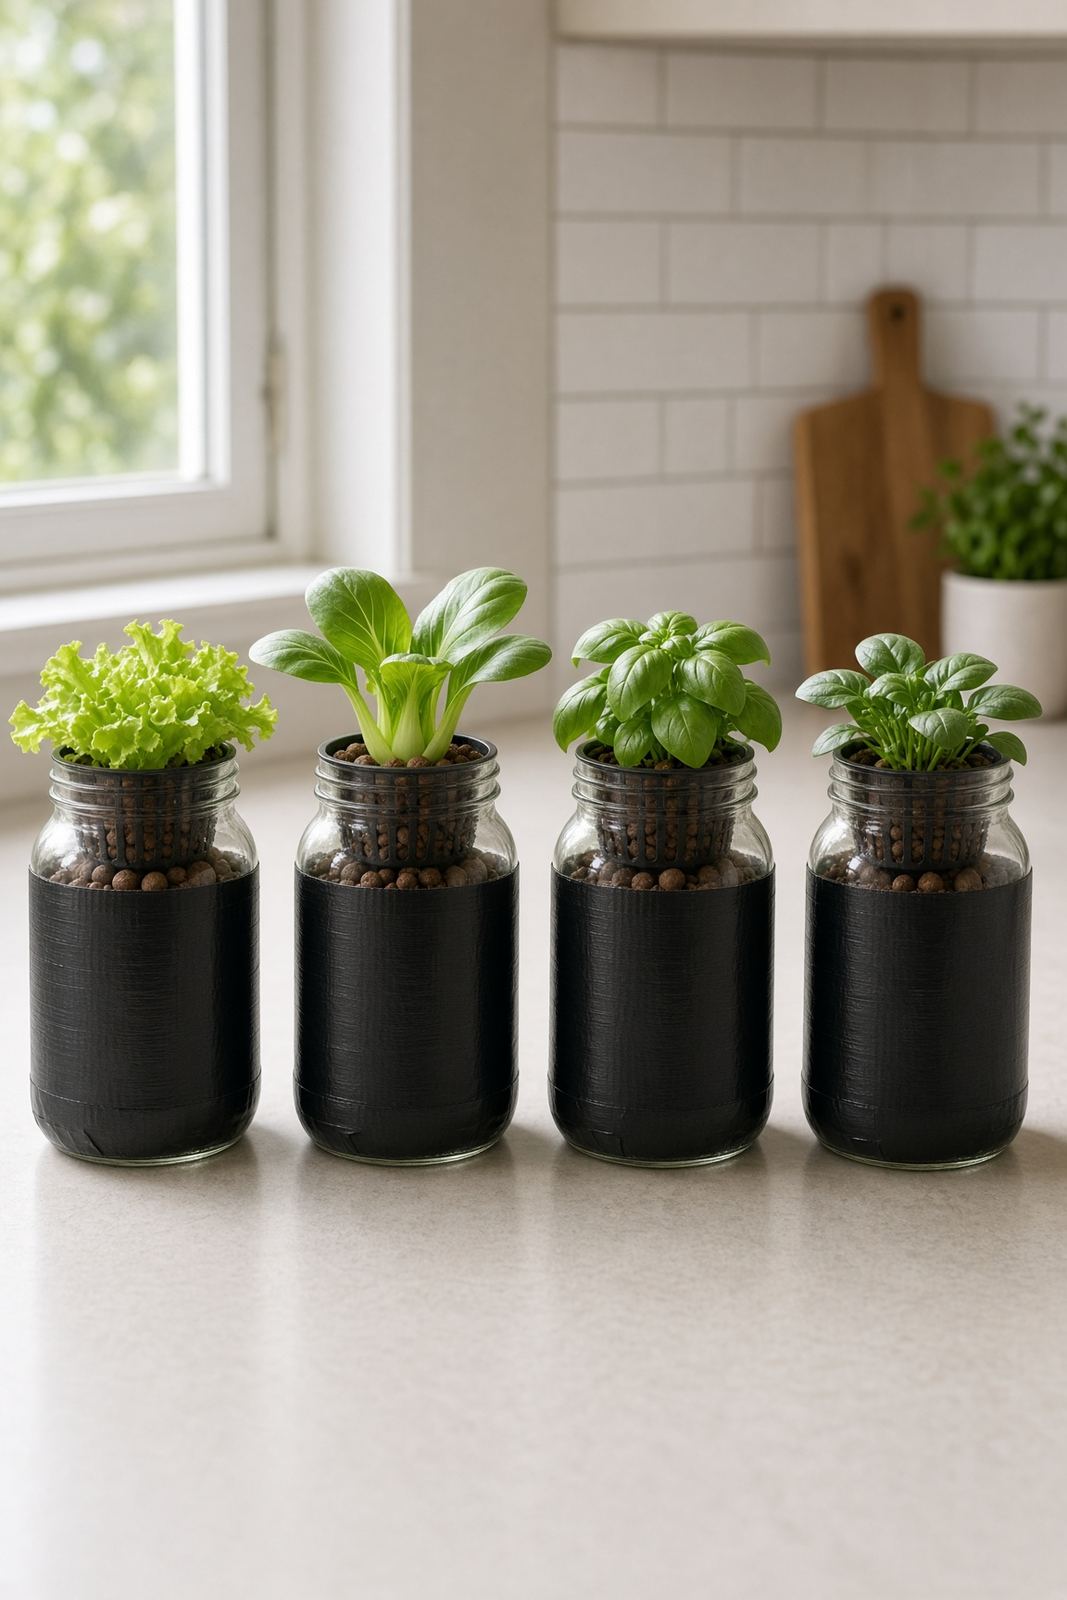
Parts to Buy
| Part | Quantity | What You Use Them For |
|---|---|---|
| Wide-mouth half-gallon mason jars (or a 27-gal tote) | 4 jars | Reservoir — one plant each |
| 3-inch net pots | 4 | Sit in the jar mouth / tote lid holes |
| 1.5-inch rockwool cubes or peat plugs | 4 | Seed starting |
| Clay pebbles, small bag | 1 | Fills the net pot around the cube |
| Black duct tape, panda film, sock covers, or opaque paint | 1 roll | Blocks all light from the reservoir |
- ·Hydroponic nutrient (a simple 1-part leafy-greens formula is plenty)
- ·pH test kit or pen, plus pH Down
- ·Distilled or filtered water if your tap is very hard
Steps
- 1Start seeds in rockwool cubes. Keep them damp and covered until sprouts show, then give them light.
- 2Block all light from the water. If a jar or tote sits in sun, go dark toward the water and white on the outside. A white outer surface reflects heat; the dark inner surface stops algae.
- 3For a tote build: put it in its final spot first — a full 27-gallon tote can weigh 200+ lbs. Use a level floor, keep the lid on, and add panda film or paint if the tote isn't opaque.
- 4Rinse clay pebbles before use until the dust runs clear. Dusty pebbles cloud the solution and can clog the net pot.
- 5Mix nutrient solution per the label — use half strength for young seedlings.
- 6Adjust pH to 5.5 – 6.2 before filling.
- 7Fill the jar so the solution just touches the bottom of the net pot (about 1/4 inch of the pebbles submerged).
- 8Set the rooted cube in the net pot and surround it with rinsed clay pebbles.
- 9Place the net pot in the jar mouth. It should sit tight. Clear glass above the tape line still grows algae, so cover every exposed surface above the water.
- 10Set the jar in bright light, but keep it out of hot afternoon sun. If leaves wilt and the jar feels warm, move it — cooked solution is the usual fail.
- 11Do not top off. As the plant drinks, the level drops and an air gap forms — that gap is what feeds the roots oxygen.
- 12For a tote build: cut 3-inch holes in the lid on 8-inch centers, fill with 15–20 gallons of solution, and treat it exactly the same way.
- 13Only refill if the water drops so far that roots would dry out before harvest. That's the exception; the default is still don't top off.
- 14Harvest when the reservoir is nearly empty — a head of lettuce usually finishes right about then (4–6 weeks).
- 15Rinse and refill for the next round. That's the whole cycle.
Tools needed
- ·Measuring cup
- ·Hole saw (3-inch) — only if using a tote lid
- ·Scissors
- ·Permanent marker
Common mistakes to avoid
- ·Topping off the water — it drowns the roots by removing the air gap
- ·Skipping the light block, then fighting green slime all season
- ·Light leak at the mouth — net pots should sit tight, and any clear glass above the tape line still grows algae
- ·Trying fruiting crops like tomatoes, which drink far more than a passive jar can hold
- ·Starting seeds directly in the net pot with no cube — they dry out before rooting
- ·Copying DWC habits — do not add an air stone, check valve, or top off like DWC. That kills Kratky.
- ·Adding a pump, check valves, or 24/7 bubbling — this is a passive system, not recirculating DWC
- ·Adding a drain bulkhead — Kratky doesn't need one; it's fill-once, harvest, then rinse and refill
Maintenance tips
Wipe jars with a vinegar rinse between crops. Check pH once a week if the plant looks pale. Toss and remix the solution if it ever smells sour or turns cloudy. Keep the lid on the tote and recheck for light leaks any time you move it.
Community builds
See how other gardeners built their no-pump kratky jars & totes (easiest hydro) — and share photos of yours.
Sign in to view photos other gardeners have shared.
Sign in to share photos of your build.