Self-Watering 18-Gallon Tote SIP
An 18-gallon tote planter with a hidden water reservoir and a wicking basket. Plants drink from below, so you water weekly in cool weather and every few days in summer heat.
Estimated time
45 – 60 minutes
Lifespan
5+ years
Soil needed
10–12 gallons of quality potting mix (not garden soil or moisture-control mix)
Weight empty
3–5 lbs
Weight full
80–120 lbs when watered
Best for
Tomatoes, peppers, eggplants, cucumbers, bush squash on patios and balconies
Placement
Full sun. Keep the fill tube accessible. Elevate the tote several inches so the overflow hole stays open and can drip freely.
Reservoir rule
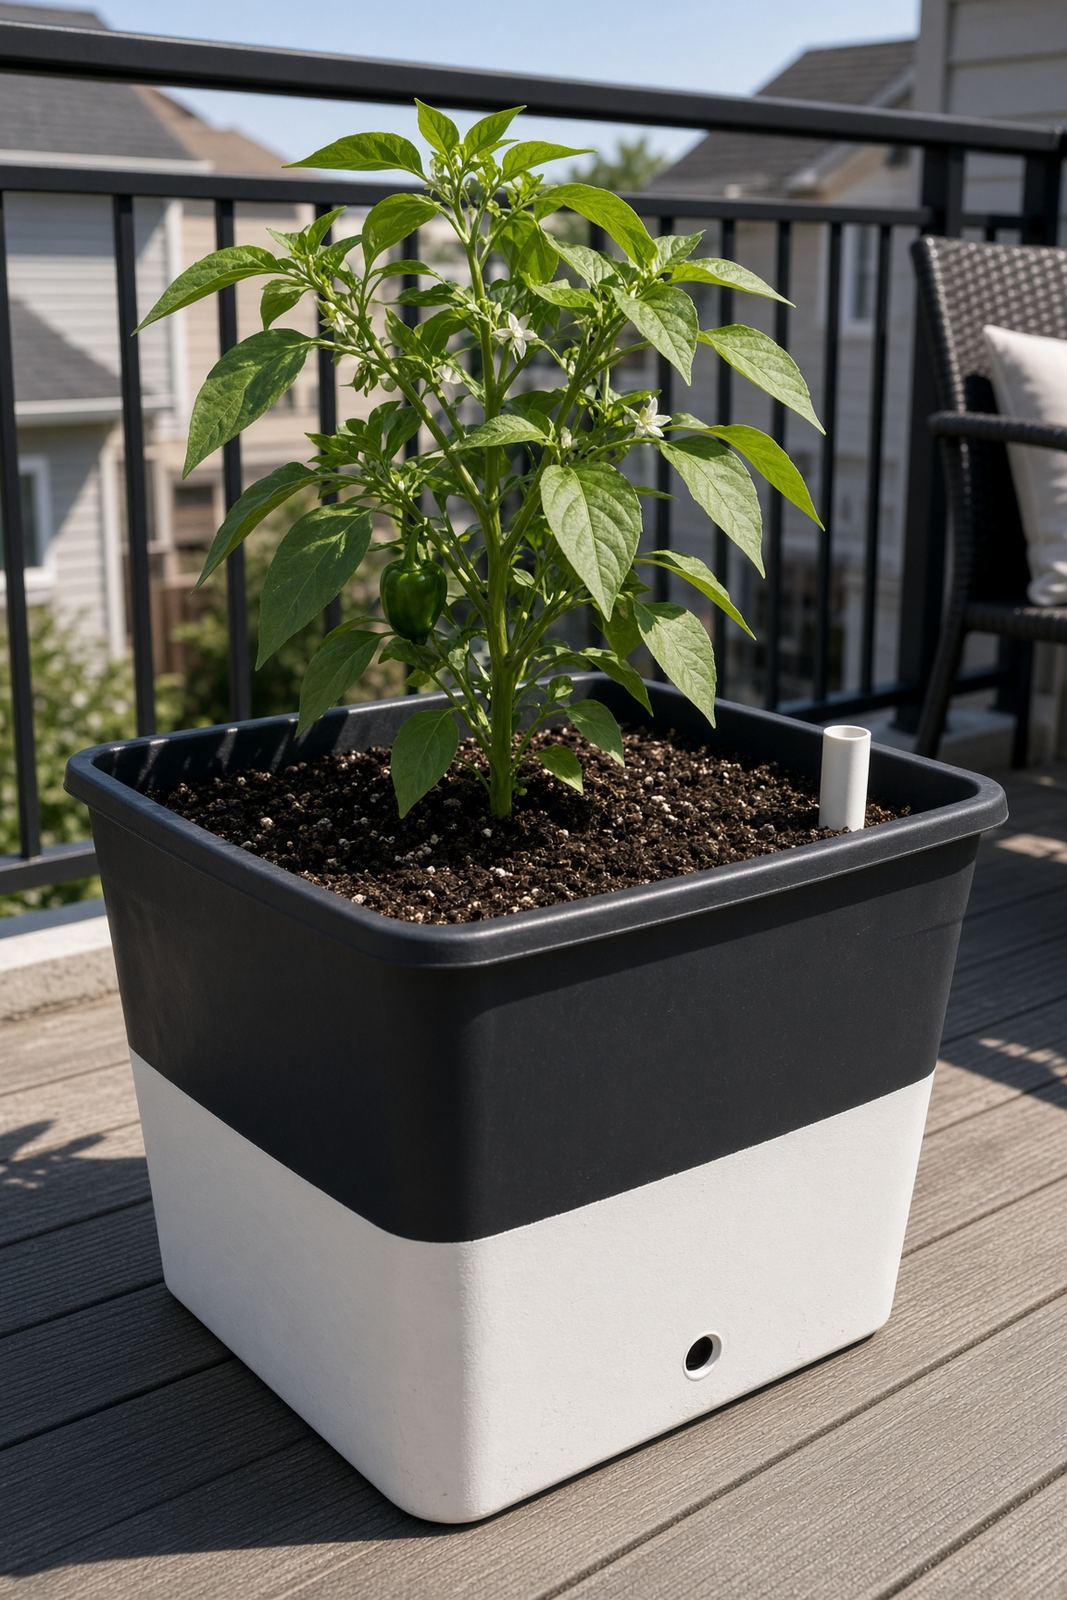
Keep light out of the water. If the tank sits in sun or under bright lights, use dark/black toward the water and white on the outside. Put a lid on it.
- Black/opaque inside = no algae
- White outside = cooler water
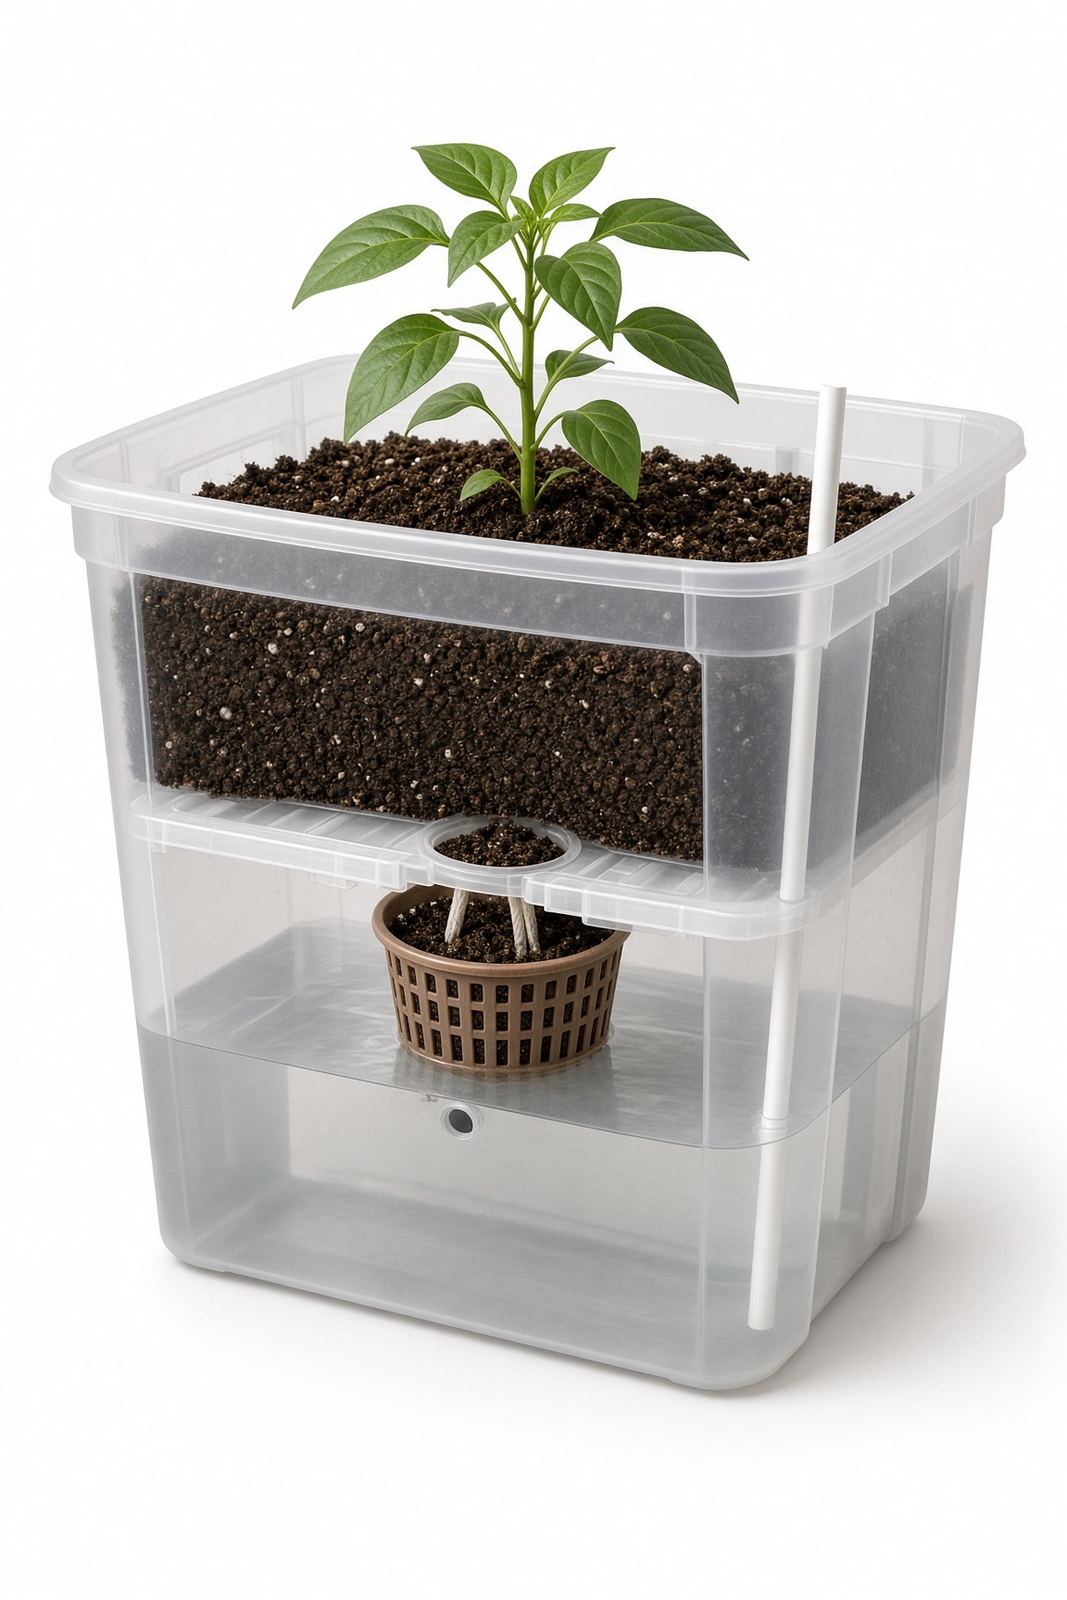
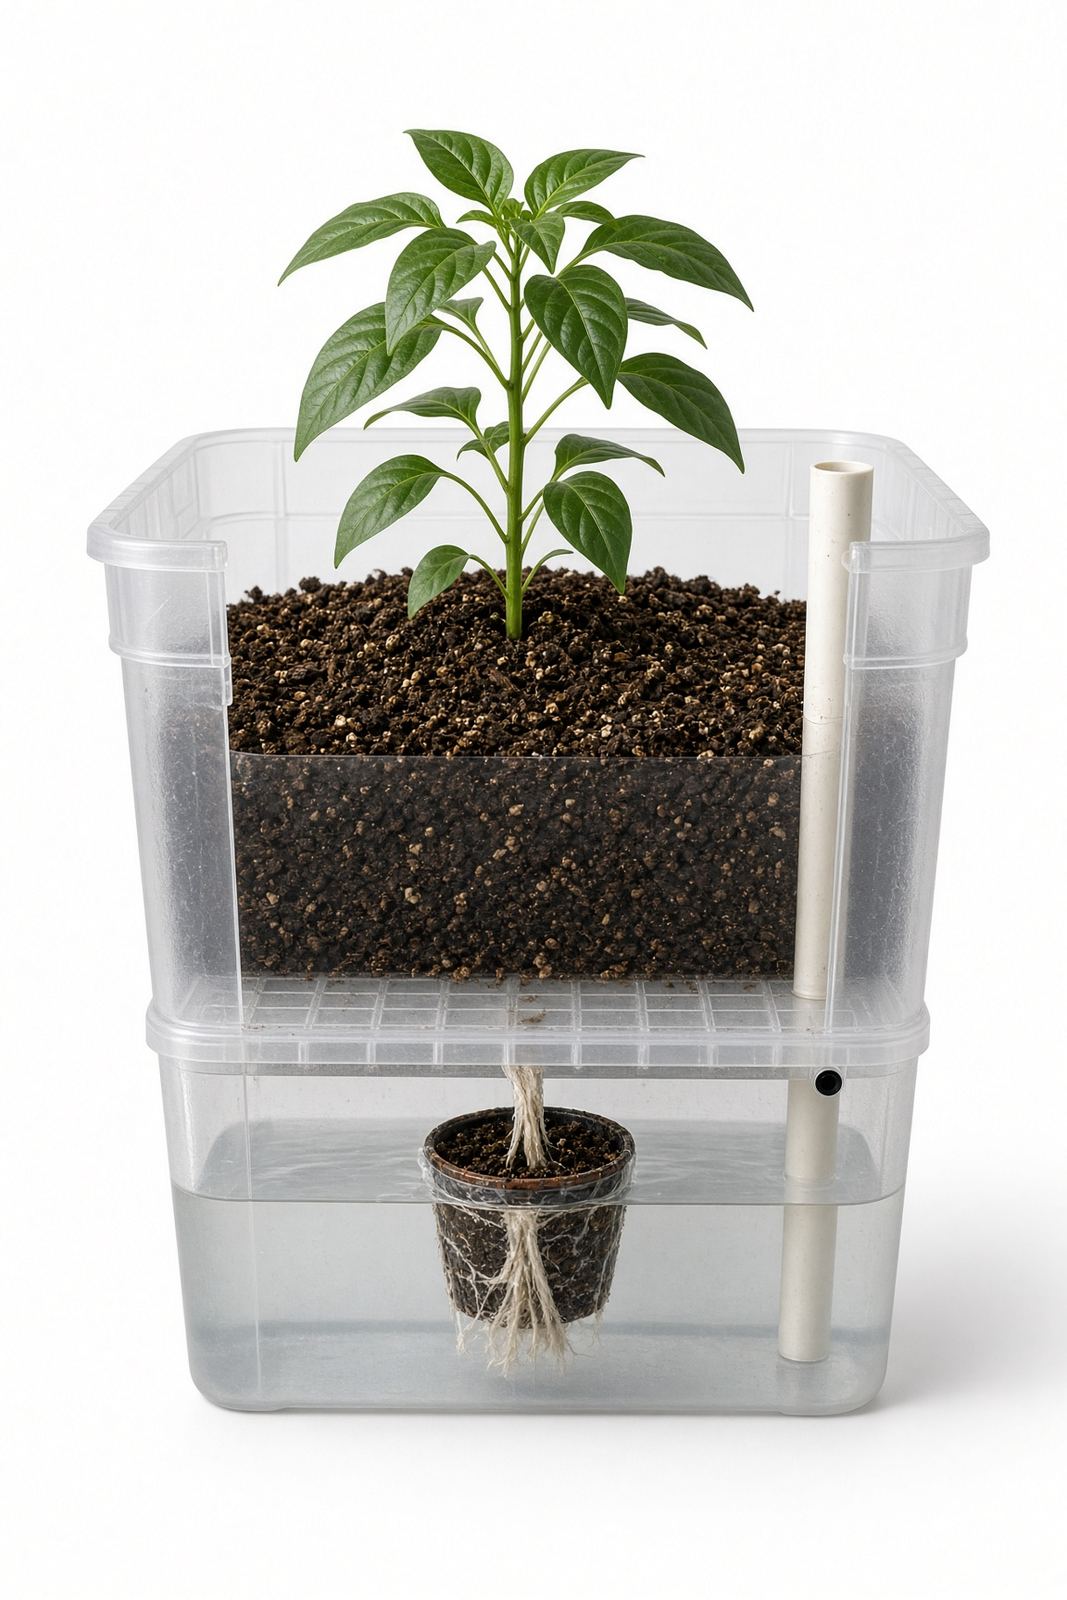
Parts to Buy
| Part | Quantity | What You Use Them For |
|---|---|---|
| 18-gallon opaque storage tote with lid | 1 | Planter body and reservoir — dark inside, white outside if it sits in sun |
| Tote lid | 1 | Cut into the false floor |
| Small plastic nursery pot, 4–6 inch | 1 | Wicking basket |
| 1/2-inch PVC pipe, 12–18 inch | 1 | Fill tube |
| Plastic window screen or landscape fabric | 1 sq ft | Covers wicking basket holes |
| Supports for false floor | 4–6 | Upside-down bottles, small pots, or 3–4 inch PVC pieces to keep the lid from sagging |
| White spray paint or reflective tape (optional) | 1 can/roll | Lightens the outside of a dark tote in hot sun |
| Mesh or cap for fill tube | 1 | Keeps mosquitoes out of the reservoir |
- ·Quality potting mix (not moisture-control mix)
- ·Compost or slow-release fertilizer
- ·Drill with 1/4-inch and 1/2-inch bits
- ·Bricks, blocks, or a small stand to elevate the tote
Steps
- 1Drill a 1/4-inch overflow hole in the side of the tote, 3 inches up from the bottom. Keep it clear of the ground when the tote is elevated.
- 2Cut the tote lid to fit inside the tote, resting 4–5 inches above the bottom. This becomes the false floor.
- 3Cut a hole in the false floor for the wicking basket so it sits with its rim flush to the floor.
- 4Drill many 1/4-inch holes in the wicking basket and line it with window screen.
- 5Cut a small notch in the false floor for the fill tube, and a few small air holes around it.
- 6Set supports under the false floor every 8–12 inches — upside-down bottles, small pots, or short PVC pieces — so 80–120 lb of wet mix does not sag the lid.
- 7Set the false floor in the tote, insert the wicking basket, and run the fill tube to the bottom.
- 8Screen or cap the top of the fill tube so mosquitoes cannot enter the reservoir.
- 9If the tote is dark and will sit in direct sun, paint or tape the outside white to keep the water and roots cooler while keeping the inside opaque.
- 10Fill the wicking basket with moist potting mix and pack it firmly.
- 11Fill the rest of the tote with loose potting mix to within 2 inches of the rim.
- 12Plant your seedling and water from the top for the first week to establish roots.
- 13After that, fill the reservoir through the tube until water runs out the overflow hole.
- 14Elevate the tote on bricks, blocks, or a stand so the overflow hole stays open and can drip freely.
- 15At the end of the season, dump the reservoir and scrub it so it does not go stagnant over winter.
Tools needed
- ·Drill
- ·Utility knife
- ·Permanent marker
- ·Scissors
Common mistakes to avoid
- ·Using garden soil instead of potting mix — it collapses the wicking air spaces
- ·Using moisture-control potting mix — it stays too soggy and can rot roots
- ·No overflow hole — roots drown in a flooded reservoir
- ·Clear tote in sun — light grows algae in the water and heats the roots
- ·No screen or cap on the fill tube — mosquitoes can breed in the reservoir
- ·Packing the soil too tight around the wicking basket
- ·Forgetting to refill the reservoir for more than a few days in peak summer
Maintenance tips
Refill weekly in spring, every few days in real heat. Empty and scrub the reservoir at the end of each season.
Community builds
See how other gardeners built their self-watering 18-gallon tote sip — and share photos of yours.
Sign in to view photos other gardeners have shared.
Sign in to share photos of your build.