Super Simple 4×8 Cedar Raised Bed
A simple, popular rectangle bed made from cedar. Great for vegetables, herbs, and flowers.
Estimated time
1.5 – 2 hours
Lifespan
8–12 years with proper care
Soil needed
32 cubic feet (about 1.2 cubic yards)
Weight empty
120–150 lbs
Weight full
1800–2200 lbs (with soil)
Best for
Vegetables, herbs, and flowers
Placement
Place on level ground in full sun. Leave space to walk around all sides.
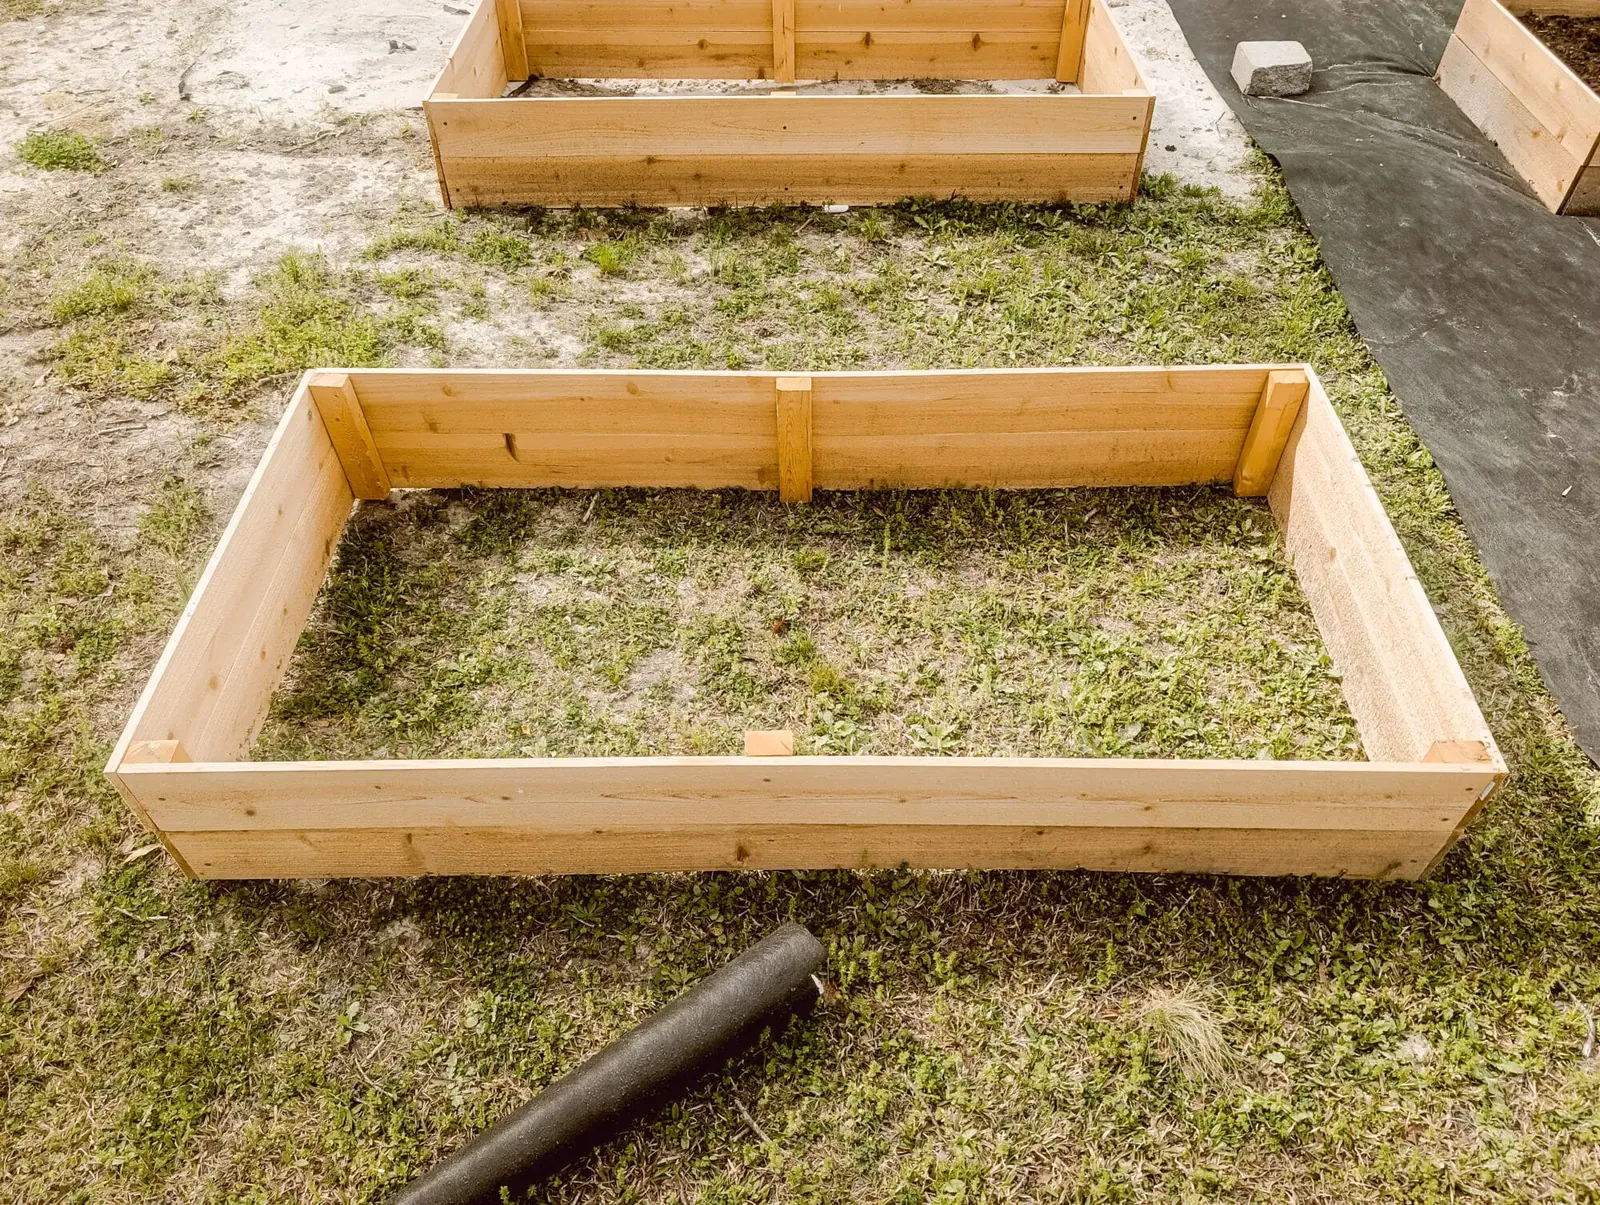
Boards to Buy
| Boards to Buy | Quantity | What You Use Them For |
|---|---|---|
| 2×6 × 8 ft cedar boards | 6 | 4 cut to 45" for short ends + 2 full length for long sides |
| 2×2 × 8 ft (optional corner + middle supports) | 1 | Cut into 4 pieces @ 11 inch for corners, plus 2 more @ 11 inch for middle supports if desired |
- ·(40) 2.5" or 3" exterior deck screws (not drywall screws)
- ·Landscape fabric (optional) — bottom weed barrier
- ·(4) Metal L-brackets (optional) — for stronger corners
Steps
- 1What you cut: keep 2 of the 8 ft boards as they are (these are the long sides).
- 2Cut the 2 short 4 ft boards into 45 inch pieces. You’ll get two 45 inch boards.
- 3Why 45 inch? So the bed ends up exactly 4 feet wide on the outside. If you don’t cut them, it will be too wide.
- 4Cut the 4 corner 2×2 boards into 11 inch pieces. You’ll get four 11 inch corner supports.
- 5Lay everything out on the ground to make a big rectangle: two long 8 ft boards on the sides, two 45 inch boards on the ends.
- 6Stand a 11 inch 2×2 corner support in each inside corner. Screw through the long and short boards into the corner support. This makes the bed much stronger and keeps it square. The supports will be flush with the top board because two 2×6 boards are really 11 inch tall.
- 7Screw the corners together. Put 4 screws in each corner (two through the long side, two through the short side).
- 8Optional: add metal L-brackets on the outside corners for extra strength.
- 9Optional: staple landscape fabric on the bottom so weeds don’t grow up into the bed.
- 10Set the bed on flat ground. Done.
- 11Tip: cedar is naturally rot-resistant. Avoid pressure-treated lumber for food gardens.
- 12Staining (Optional): Cedar is naturally resistant to rot. If you want the bed to look better and last longer, you can stain or seal the outside only. Avoid staining the inside if you plan to grow vegetables or herbs.
- 13Optional: add a 2×2 middle support on each long side to keep the boards from bowing outward under soil pressure. Cut two 11-inch pieces from the leftover 2×2 × 8 ft board and screw one to the middle of each long side, driving the lower end into the ground for extra hold.
- 14Do you need corner boards? For a 4 ft bed, not really. For a 6–8 ft bed like this one, yes — recommended. For over 8 ft, strongly recommended.
Optional upgrades
Optional: carrot & radish row boards + soaker hose
Lay 2×4 dividers inside the bed for neat root-crop rows, with a soaker hose tucked underneath for steady watering once seedlings are established.
When to use it
- ·Carrots, radishes, and other small root crops that like straight rows
- ·When you want hands-free watering after seedlings are up and rooted
- ·If you already plan to water the soil surface by hand until germination
| Part | Quantity | What You Use It For |
|---|---|---|
| 2×4 cedar boards | cut to fit 45 in | Row dividers laid across the 4 ft width of the bed |
| Soaker hose | ~8 ft per bed | Runs underneath the boards to water the rows |
| Garden staples or U-pins | as needed | Hold the hose in place under the boards |
- ·2×4 cedar boards — enough to span the 4 ft width of the bed (cut to fit)
- ·50 ft soaker hose (or cut to bed length)
- ·Hose-end cap or figure-8 clamp
- ·Garden staples or U-shaped wire pins to hold the hose
- ·Optional: elbow fitting to connect soaker hose to your garden hose
- 1Build the 4×8 cedar bed first and fill it with loose, rock-free soil. Root crops need smooth soil — remove sticks and clumps now.
- 2Lay the soaker hose along the bottom of the bed, running the full 8 ft length. Keep it a few inches in from the long edges so water reaches the planting zones.
- 3Cut 2×4 boards to 45 inches so they sit across the 4 ft width of the bed, resting on the soil surface. You’ll need enough to create rows every 8–12 inches, but exact count depends on how wide you want each planting strip.
- 4Place the first 2×4 at one end of the bed. Lay the next one parallel, leaving a 6–8 inch gap between boards for planting. Repeat down the bed.
- 5Make sure the soaker hose runs underneath the boards, not on top. The wood holds the hose down and hides it, while water soaks up through the soil below.
- 6Secure the hose with garden staples or U-shaped wire pins so it doesn’t shift when you fill soil around it.
- 7Sow carrot or radish seeds in the gaps between the boards. The 2×4s act as row guides and keep the soil from washing together.
- 8Water the soil surface by hand (or a gentle sprinkler) until seeds germinate and roots are established. The buried soaker hose is not enough on its own at first — the top layer dries fastest and the seeds sit right there.
- 9Once seedlings are up and a few inches tall, switch to the soaker hose. Run it for 20–30 minutes, 2–3 times a week, or whenever the top inch of soil feels dry.
- 10Tip: keep the hose end accessible. In fall, you can lift the boards, pull the hose, and plant something else without rebuilding the bed.
Tips
- ·Even moisture is the secret to carrot germination — dry crust is why most carrot seeds fail.
- ·Don't rely on the soaker hose alone until roots are deep enough to pull water up from below.
- ·Don't crush the soaker hose under heavy boards; let it rest in the soil, not flattened.
- ·Leave enough gap between boards to get your hand and a small rake in for thinning.
- ·Radishes germinate fast; carrots can take 2–3 weeks. Keep the surface lightly moist until you see green.
Tools needed
- ·Circular saw or miter saw
- ·Cordless drill / driver
- ·Tape measure
- ·Pencil
- ·Speed square (very helpful for making straight cuts and checking square corners)
- ·Safety glasses & work gloves
- ·Optional: staple gun (only if using landscape fabric)
Common mistakes to avoid
- ·Not making the bed square
- ·Using regular screws instead of deck screws
- ·Not adding corner supports on long beds
- ·Placing it on uneven ground
Maintenance tips
Check screws once a year and tighten if needed. Re-stain the outside every 2–3 years if desired.
Community builds
See how other gardeners built their super simple 4×8 cedar raised bed — and share photos of yours.
Sign in to view photos other gardeners have shared.
Sign in to share photos of your build.