Self-Wicking Raised Bed
A raised bed with a built-in water reservoir below the soil. Plants wick water up as needed, dramatically cutting watering chores in hot, dry climates.
Estimated time
3 – 4 hours
Lifespan
10–15 years
Soil needed
32 cubic feet of soil + 6 cubic feet of coarse gravel (gravel displaces water, so the actual water layer is less than a full 6 inches)
Weight empty
200–250 lbs
Weight full
2500–3000 lbs
Best for
Tomatoes, peppers, squash, and any bed in hot, dry climates
Placement
Must sit perfectly level — a sloped base lets the reservoir drain unevenly and one end dries out. Keep the overflow outlet clear and draining. Ground only; never on a wood deck.
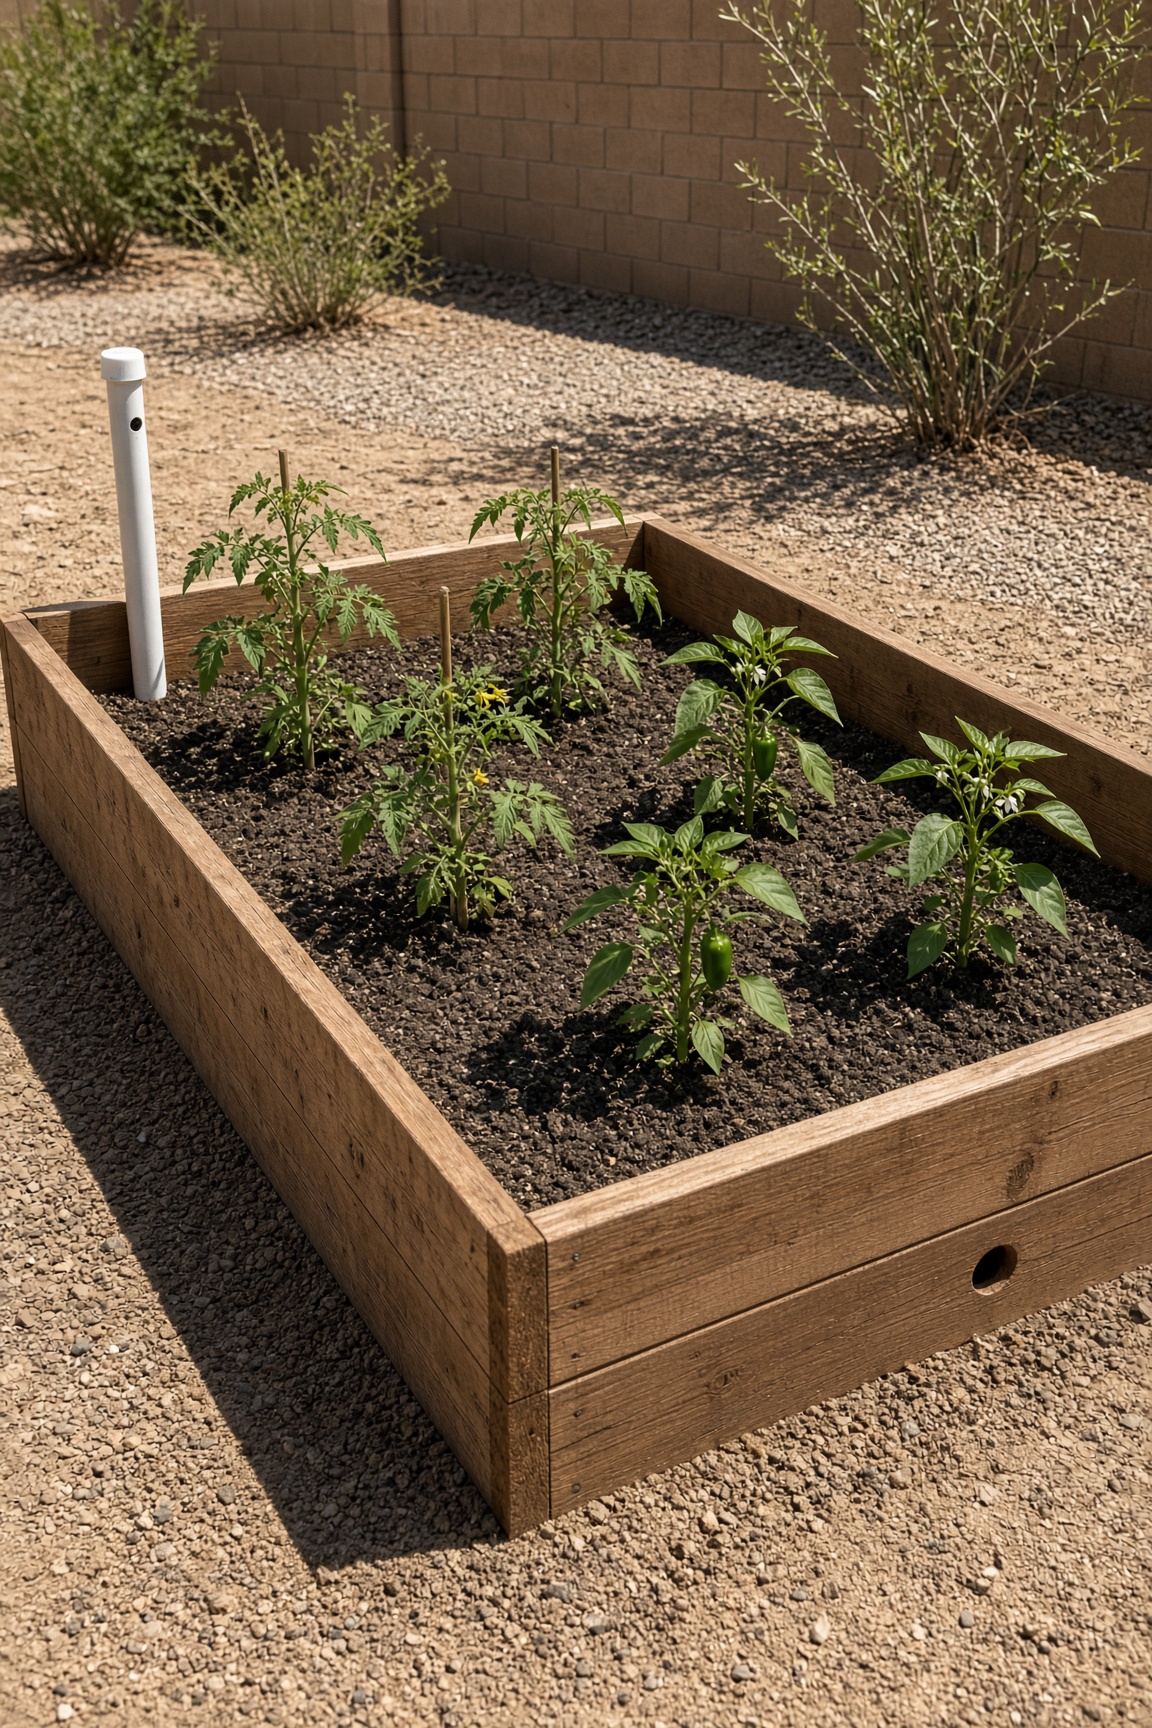
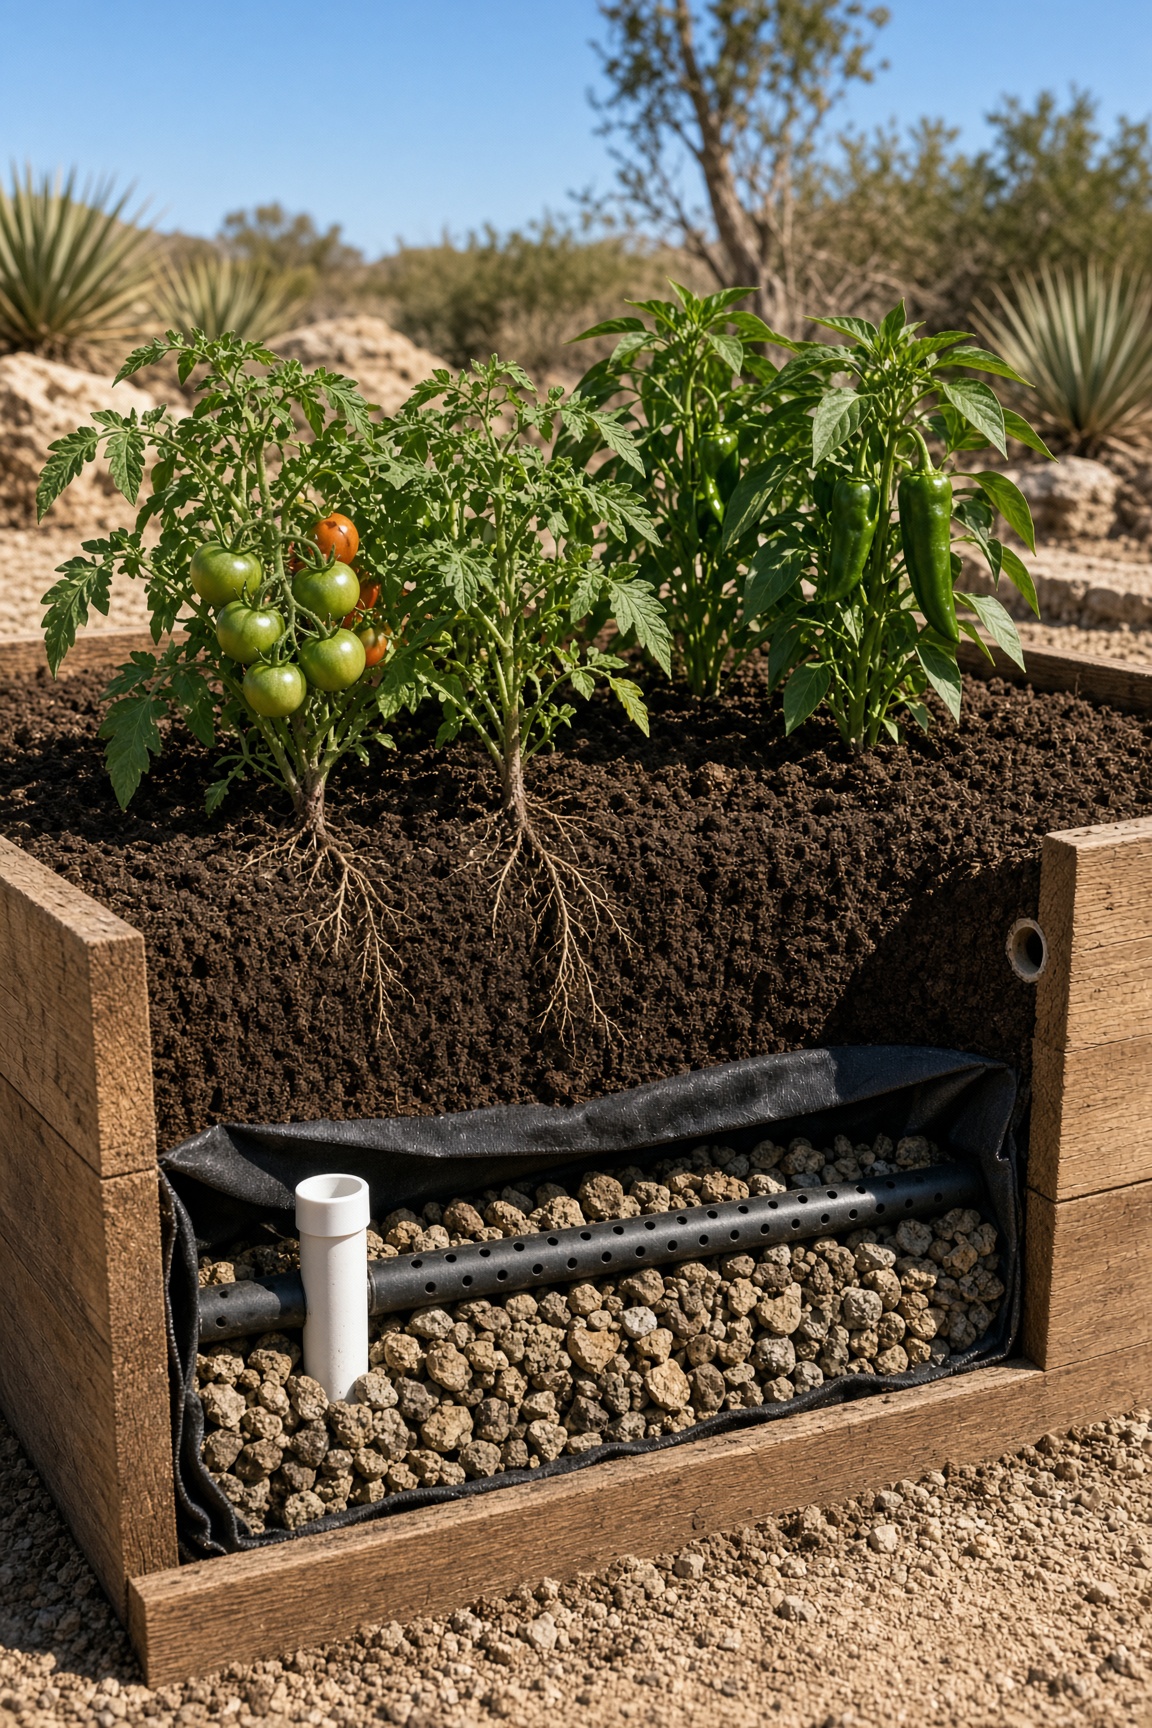
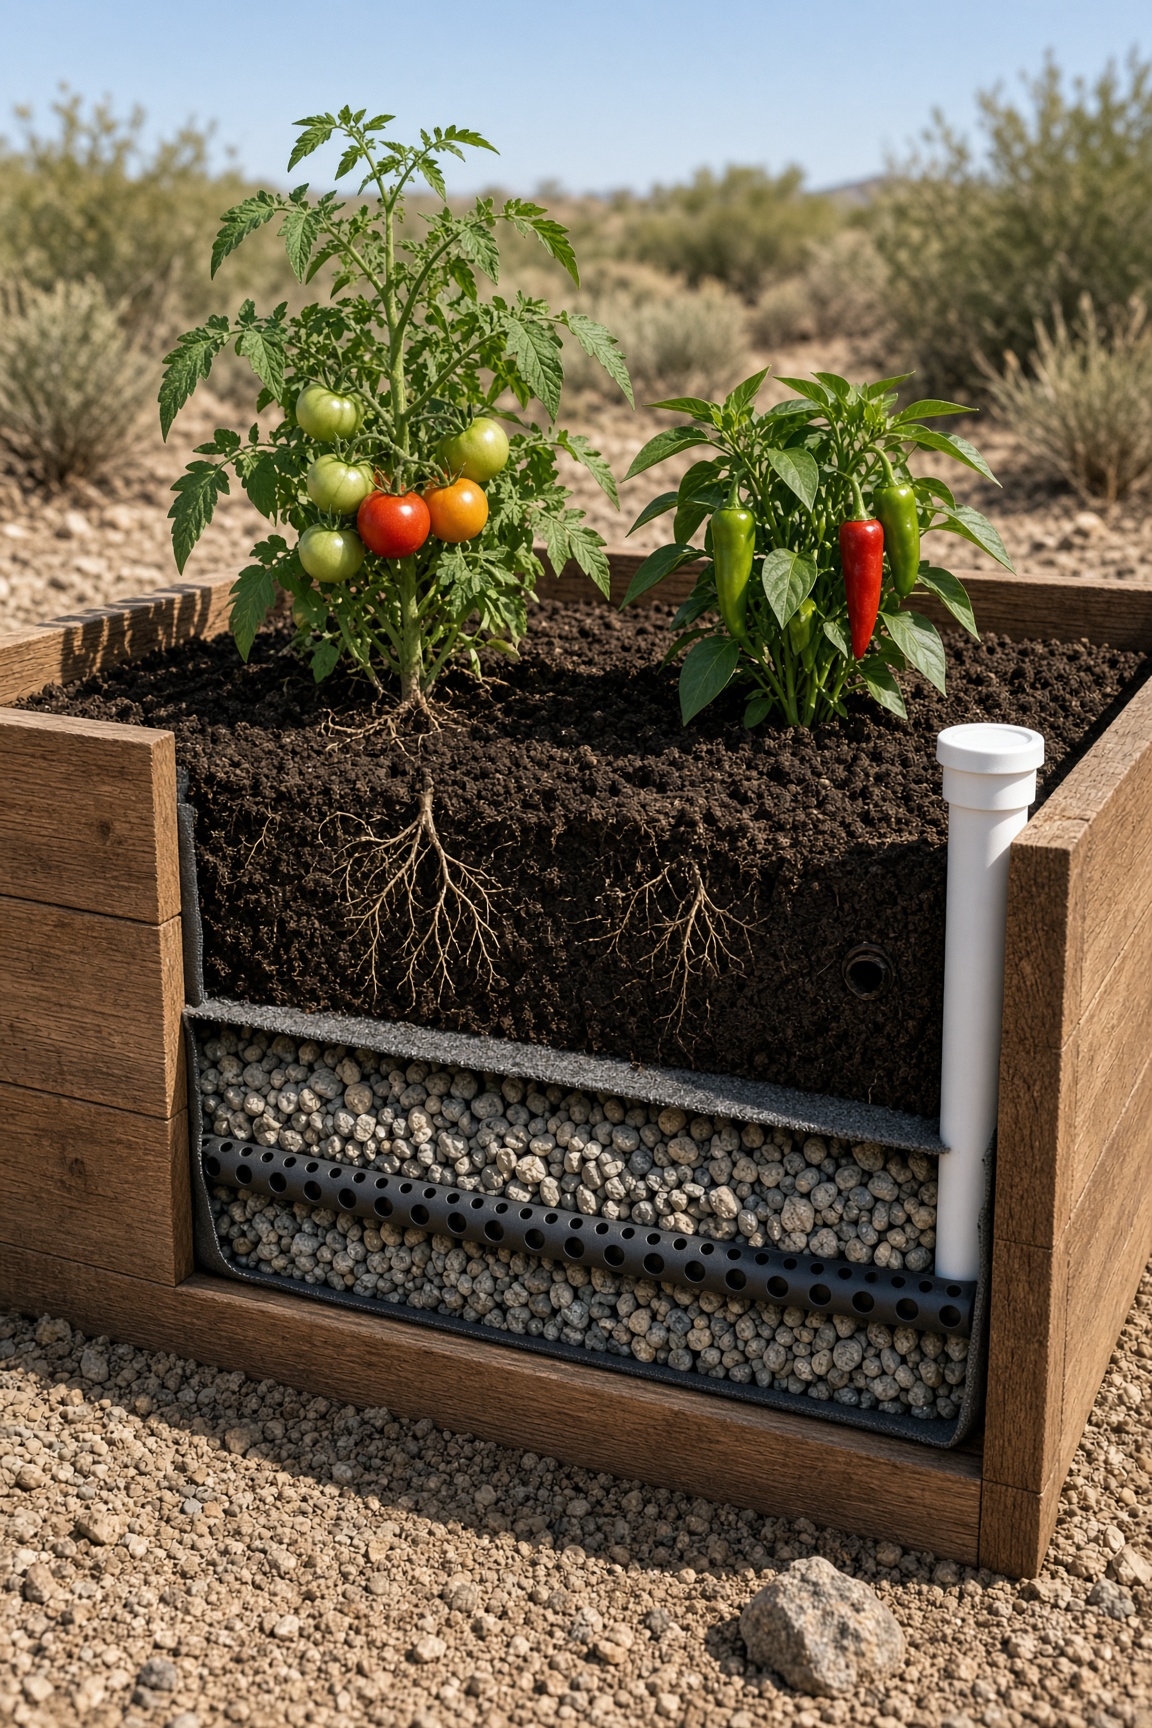
Boards to Buy
| Boards to Buy | Quantity | What You Use Them For |
|---|---|---|
| 2×12 cedar or composite boards, 8 ft | 4 | Long sides and ends (actual ~11.25 in height) |
| 4×4 posts, 8 ft | 2 | Corner posts cut to 12 inch |
| EPDM pond liner, 10×15 ft | 1 | Lines the reservoir (treat it like a tank) |
| 3/4 inch clean gravel | 6 cubic ft | Reservoir fill |
| Perforated drain pipe, 4 inch × 10 ft | 2 | Distributes water in reservoir |
| Landscape fabric / geotextile | 1 roll | Separates soil from gravel |
- ·PVC fill tube, 2 inch × 3 ft
- ·PVC elbow and cap for fill tube
- ·Fine mesh screen for fill tube cap (keeps mosquitoes out)
- ·Exterior deck screws, 3 inch
- ·Silicone sealant
Steps
- 1Build a standard 4×8 box with 2×12 boards and 4×4 corner posts cut to 12 inches. The actual board height is about 11.25 inches, so the overflow goes at roughly 6 inches up from the bottom — near the top of the gravel layer.
- 2Line the inside with EPDM pond liner, folding corners neatly. The liner is the water tank; don't substitute a blue tarp.
- 3Install a 2-inch PVC fill tube in one corner, running down to the bottom.
- 4Cap the fill tube and add a fine mesh screen to block light, algae, and mosquitoes.
- 5Drill an overflow hole through the side about 6 inches up from the bottom, and make sure it drains away from the bed.
- 6Lay perforated drain pipes on the liner, spaced evenly across the bottom.
- 7Fill the bottom 6 inches with 3/4 inch clean gravel. Gravel takes up space, so the usable water layer is less than a full 6 inches — the ~80-gallon figure accounts for the voids between stones.
- 8Cover the gravel with landscape fabric to keep soil from sifting down.
- 9Fill the rest with good raised-bed soil mix. Don't pack garden clay in as the wick.
- 10Water heavily from the top for the first week to establish the wick, then fill through the tube until water flows from the overflow.
- 11Check the bed with a level before planting; even a slight tilt will leave one end dry.
Tools needed
- ·Circular or miter saw
- ·Cordless drill / driver
- ·Tape measure and level
- ·Staple gun
- ·Utility knife
Common mistakes to avoid
- ·Wall height that doesn't match the boards — a 2×12 is only ~11.25 in, so a 12-in overflow won't fit
- ·Using the wrong liner — EPDM pond liner is best; cheap tarps rot
- ·No overflow hole, so the bed floods in heavy rain
- ·Overflow that doesn't drain away — roots will drown in a storm
- ·Reservoir gravel too fine — use 3/4 inch clean stone, not pea gravel
- ·Filling the reservoir before the soil is settled — it turns to mud
- ·An open fill tube — light gets in and grows algae and mosquitoes
- ·Packing garden clay as the wick — use a mix that actually wicks
- ·Placing 2,500–3,000 lb on a deck or balcony
Maintenance tips
Clear the overflow after storms. Refill through the inlet pipe weekly in peak heat. Replace the wicking cloth every 3–4 years.
Community builds
See how other gardeners built their self-wicking raised bed — and share photos of yours.
Sign in to view photos other gardeners have shared.
Sign in to share photos of your build.